
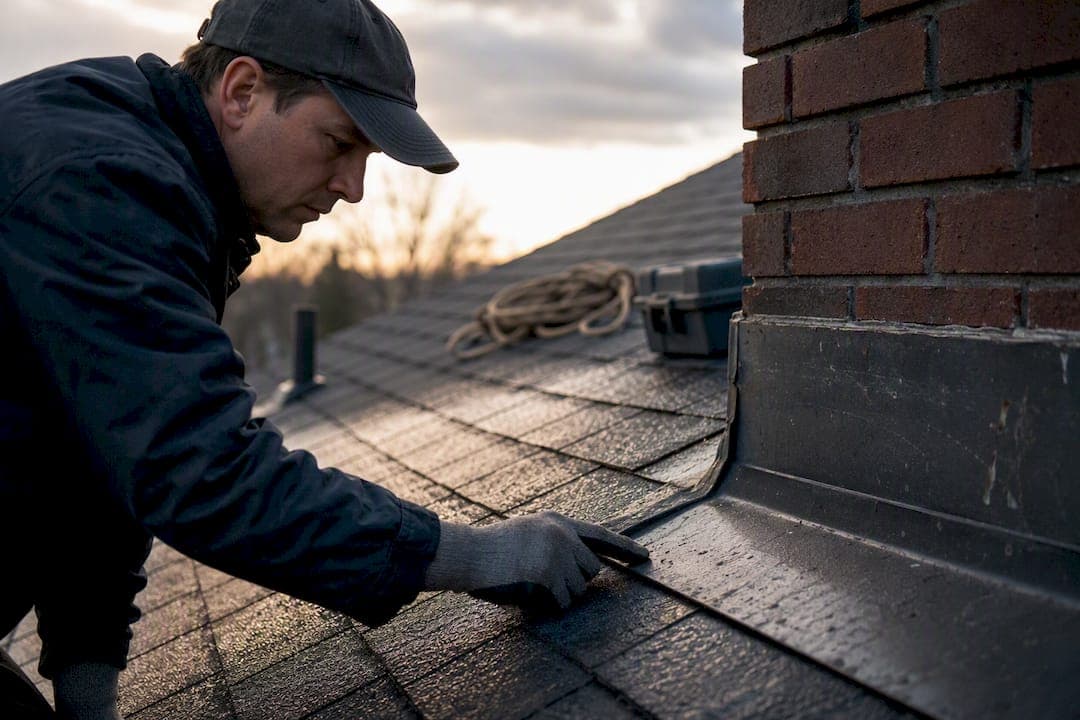
If water is showing up near your chimney, flashing is the most likely culprit. It sits at the seam where your roof meets the masonry, and it fails more often than the roof itself does. But a stain alone doesn't confirm it. You need two quick checks before you call anyone.
First, grab a flashlight and look in your attic near the chimney chase for wet insulation, dark streaking, or actual daylight where there shouldn't be any. Second, step outside with binoculars and scan for lifted metal, gaps, or dried tar patches around the base. If you spot damage, photograph it right away and hold off on any contractor who wants to caulk it on the spot.
- Check the attic near the chimney for damp insulation or visible light gaps.
- Scan the exterior with binoculars for lifted flashing, rust, or tar patching.
- Photograph anything suspicious before requesting quotes.
Pro Tip: Take your attic photos during or right after a rainstorm. Wet insulation dries fast, and a dry attic on a sunny Tuesday can hide a leak that was obvious 48 hours earlier.
Key Takeaways
Correctly matching a chimney flashing leak to one of six failure modes determines both its 2026 repair cost and how long the fix will actually last.
| Point | Details |
|---|---|
| Confirm before you fix | Check the attic and use binoculars from the ground before accepting any repair quote. |
| Match repair to failure mode | Reseals run $400, while full rebuilds with a cricket can reach $2,500. |
| Check chimney width | Chimneys over 30 inches on the uphill side need a cricket under IRC 2024 R1003.20. |
| Demand a real diagnosis | Insist on a hose test and photo documentation before agreeing to any scope of work. |
| Get insured, diagnosis-first repairs | Jhroof runs attic checks and hose tests before quoting, backed by warranties and 24-hour emergency response across Kent. |
Table of Contents
- What Is Chimney Flashing and How Should It Work?
- What Are the Six Common Chimney Flashing Failure Modes?
- Which Exterior Signs Point to a Chimney Flashing Leak?
- What Interior and Attic Clues Confirm a Chimney Leak?
- How Do You Diagnose a Chimney Flashing Leak Step by Step?
- What Does Chimney Flashing Repair Cost in 2026?
- Should You Call a Roofer or a Mason?
- How Often Should You Inspect and Maintain Chimney Flashing?
- Why Trust J.H. Roofing's Chimney Flashing Diagnosis?
- What Materials and Tools Does a DIY Flashing Repair Need?
- How Does Weather Affect Chimney Flashing Longevity?
- An Editorial Take on Chimney Flashing Repair Costs
- How Jhroof Handles Chimney Flashing Repairs in Kent
- Sources
What Is Chimney Flashing and How Should It Work?
Chimney flashing is really a two-part system, not one piece of metal. Step flashing tucks under each row of shingles going up the sides of the chimney, while counter flashing is embedded into the mortar joint above it and folds down over the step flashing like a cap. The two layers overlap but aren't sealed together, because the roof and the masonry chimney move independently with temperature swings and settling. That gap is intentional.
- Apron or base flashing seals the downhill side where the roof meets the chimney face.
- Step flashing interlocks with each shingle course along the sides.
- Counter flashing is set into a mortar reglet and covers the step flashing from above.
A cricket, sometimes called a saddle, is a small peaked structure built into the uphill side to divert water and debris around the chimney instead of letting it pool. IRC 2024 Section R1003.20 requires one on any chimney wider than 30 inches on that uphill face.
What Are the Six Common Chimney Flashing Failure Modes?
Most chimney flashing leaks trace back to one of six recognizable problems, and matching the right one to what you see changes both the fix and the price. A breakdown of these failure modes shows that correct diagnosis, not the size of the stain, is what determines whether you're looking at a $400 reseal or a $2,500 rebuild.
- Dried sealant at the reglet: caulk has shrunk or cracked; a straightforward reseal usually solves it.
- Cracked mortar or reglet joint: the groove holding the counter flashing has crumbled; needs saw-cut re-bedding.
- Missing counter flashing: only step flashing exists, exposed and unprotected; requires a mason or roofer to install the top layer.
- Separated or rusted step flashing: individual pieces have pulled loose or corroded through; needs partial or full replacement.
- Masonry crown or brick failure: water enters through the chimney cap or joints, not the flashing at all; needs masonry repair.
- Missing uphill cricket: water pools against a wide chimney's back side with nowhere to go; needs a cricket built in.
The same interior ceiling stain can point to any of these six, which is exactly why a contractor who diagnoses by looking at your ceiling instead of your roof is guessing.
Which Exterior Signs Point to a Chimney Flashing Leak?
You can spot most warning signs safely from the ground with a pair of binoculars. Climbing onto the roof yourself to inspect flashing up close isn't worth the risk when a decent set of binoculars tells you almost as much.
- Rust streaks or orange discoloration on the metal usually means the flashing has been wet for a long time and is likely near the end of its life.
- Bent, lifted, or missing flashing pieces are visible gaps that let water in directly during any rain.
- Blobs of tar or roofing cement around the joint mean someone already tried a quick patch, and it's failing or has already failed.
- Shingles lifted or curling right next to the chimney often signal water getting underneath from a flashing gap rather than normal shingle wear.
- Shingles that stay dark and wet behind the chimney long after the rest of the roof has dried point to trapped water, often from a missing cricket.
Rust or a single lifted piece often means a targeted reseal will do. Multiple signs together, especially combined with tar patches, usually mean you're looking at a full reflash rather than a quick fix.
What Interior and Attic Clues Confirm a Chimney Leak?
Water doesn't fall straight down. It travels along rafters and sheathing before it shows up on your ceiling, so a stain near the chimney doesn't always mean the leak starts there. It can appear several feet away from the actual entry point.
- Ceiling or wall stains near the chimney, especially ones shaped like rings or that reappear after every storm.
- Wet or matted insulation in the attic directly around the chimney chase.
- Musty smells that show up specifically after rain, even without a visible stain yet.
- Bubbling or peeling paint near the chimney, a sign moisture has been present long enough to lift the surface.
Document the date of each stain relative to storms, and note whether it fades in dry weather or stays put. Contractors and insurers both take that timeline seriously.
How Do You Diagnose a Chimney Flashing Leak Step by Step?
Guessing wastes money. The most reliable diagnostic sequence starts small and safe, then escalates only as needed.
- Check the attic during or right after rain with a flashlight, looking for active drips, wet wood, or daylight gaps.
- Scan the exterior from the ground with binoculars, noting rust, gaps, or tar patches around the chimney base.
- Run a controlled hose test, starting low on the chimney and working upward, while someone watches inside the attic. Repeat from a couple of different angles, since wind-driven rain can enter from one side and not another.
- Escalate to a ladder inspection or have a contractor pull nearby shingles if the hose test doesn't reproduce the leak, since some failures only show up under the shingle line.
The low-to-high, multiple-angle hose test matters because a leak that only appears with wind from the northeast will never show up if you only spray from one side.
Pro Tip: If a contractor shows up, looks at the chimney for thirty seconds, and quotes a caulk job without ever getting on a ladder or running a hose test, get a second opinion. A real diagnosis takes at least twenty minutes.
What Does Chimney Flashing Repair Cost in 2026?
Repair cost tracks directly to which of the six failure modes you're dealing with, and matching the quote to the actual problem is the single best way to avoid overpaying or underpaying.
| Repair Type | 2026 Cost Range | Expected Service Life |
|---|---|---|
| Reseal or re-bed reglet (metal still sound) | $400 | 10–20 years |
| Partial step flashing replacement | $400 to $1,800 | 25–40 years |
| Full counter-flashing rebuild with saw-cut reglet | $2,500 | 25–40 years |
| Masonry crown or tuckpointing repair | $300–$2,500 | Varies by scope |
| Add cricket (chimney over 30 inches uphill) | $1,800 added | 25–40 years |
These figures line up with national cost guides, which show most flashing jobs landing between $400 and $1,800 depending on access, height, and shingle condition.
- A caulk-only fix in the $200 to $400 range often looks like the cheap option, but it commonly fails within two to five years and gets you nowhere near the 25 to 40 year lifespan of a proper reflash.
- Steep roofs, extra stories, or shingles that need to be pulled and replaced all add labor cost beyond the base ranges above.
- Some fabricators now recommend winged flashing corners that route water away from the pinhole-prone corner joints entirely, cutting long-term reliance on sealant.
If your chimney is over 30 inches wide on the uphill side and has no cricket, budget for one. Without it, even a perfectly installed flashing job will keep leaking as water and debris pool against the brick.
Should You Call a Roofer or a Mason?
Roofers handle step flashing, counter flashing, and anything tied to the shingle line. Masons handle the crown, brickwork, tuckpointing, and flue or cap issues. Plenty of jobs need both, especially when a cracked crown has damaged the mortar joint that holds the counter flashing.
Before you sign anything, ask:
- Will you saw-cut a new reglet or just surface-mount the flashing?
- What metal are you using, and does it match what's already there?
- What sealant brand, and is it polyurethane-based rather than tar or asphalt?
- What warranty comes with the labor and the materials separately?
- Will you photograph the diagnosis and perform a hose test before quoting?
- Will you bring in a mason if the crown or mortar needs attention?
- What's your ladder and access safety plan for a job at this height?
- Can I get an itemized quote separating labor from materials?
If the answer to "we'll just caulk it" or "we don't need to lift the shingles" comes back fast and confident, walk away.
How Often Should You Inspect and Maintain Chimney Flashing?
Small flashing problems stay small if you catch them early. Left alone, they turn into rotted decking and ceiling damage that costs far more than the original fix.
- Inspect every fall before winter weather arrives, and again after any major storm.
- Check sealant condition every three to five years, even if nothing looks obviously wrong.
- If your roof shingles have less than five years of life left, pair flashing replacement with the re-roof rather than paying for two separate jobs.
- Avoid mixing metals like copper and aluminum next to each other, since they corrode faster in contact.
- Skip tar-based patch compounds; they harden, crack, and trap moisture underneath.
- Clear leaves and debris from behind the chimney where water tends to collect.
Why Trust J.H. Roofing's Chimney Flashing Diagnosis?
Jhroof has been a family-owned, insured roofing company across Kent for over 10 years, backed by a 4.7-star Google rating and 24-hour emergency response. Every chimney flashing job starts the same way: attic inspection, a controlled hose test, and photo documentation before a single number goes on a quote.
- Insured, warrantied repairs, not surface patches.
- Diagnosis-first approach, shown in a flat roof replacement case study documenting the same methodical process.
- Full range of roofing services covering flashing, leadwork, and masonry coordination.
What Materials and Tools Does a DIY Flashing Repair Need?
Most homeowners can handle a minor reseal, but the materials matter more than the effort. Skip generic hardware-store caulk and reach for a high-grade polyurethane sealant, which flexes with temperature changes instead of cracking like standard silicone or tar-based products. A reliable approach embeds counter flashing 2 to 3 inches into sound mortar and backs it with polyurethane sealant rather than surface-gluing the metal in place.
For the job itself, you'll want:
- A wire brush and masonry chisel to clean out old, crumbling sealant or mortar from the reglet before applying anything new.
- A caulking gun rated for thick sealants, since polyurethane products are stiffer than standard caulk and cheap guns struggle to push them through.
- Galvanized or aluminum flashing stock matched to whatever metal is already on your chimney, since mixing metals accelerates corrosion.
- Tin snips or aviation shears for cutting step flashing pieces to fit around irregular brick courses.
- A stable extension ladder with standoff stabilizers to keep weight off the gutter and shingles while you work.
- A hose with an adjustable nozzle for the diagnostic test before and after the repair.
- Roofing nails or screws appropriate to your flashing metal, plus a small level to keep new pieces straight.
If the reglet is cracked or missing counter flashing entirely, that's a mortar job requiring a grinder with a diamond blade to cut a clean groove, which is where most DIY attempts should stop and a professional should start.
How Does Weather Affect Chimney Flashing Longevity?
Flashing takes more abuse than almost any other part of your roof, because it sits at a joint between two materials that expand and contract at different rates. Metal roofing flashing moves with temperature swings, while the brick or block chimney barely moves at all. Every freeze-thaw cycle stresses the seal between them a little more.
In colder climates, ice damming is the biggest threat. Snow melts near the warm chimney, refreezes at the roofline, and forces water backward under shingles and flashing that were never designed to hold standing water. Repeated freeze-thaw cycles also crack mortar joints faster, which is why counter flashing failures cluster in regions with harsh winters.
Hot, sunny climates bring a different problem: UV degradation. Sealants dry out, shrink, and crack years before they would in a shadier, cooler region. A polyurethane sealant that lasts 10 to 15 years in a mild climate might only manage 7 or 8 years under constant direct sun.
Coastal properties face accelerated metal corrosion from salt air, which shortens the lifespan of untreated steel flashing considerably compared to aluminum or copper. High-wind regions add another layer of risk, since wind-driven rain can force water sideways under flashing that would otherwise shed a straight-down rain just fine, which is exactly why hose tests need to be run from multiple angles.
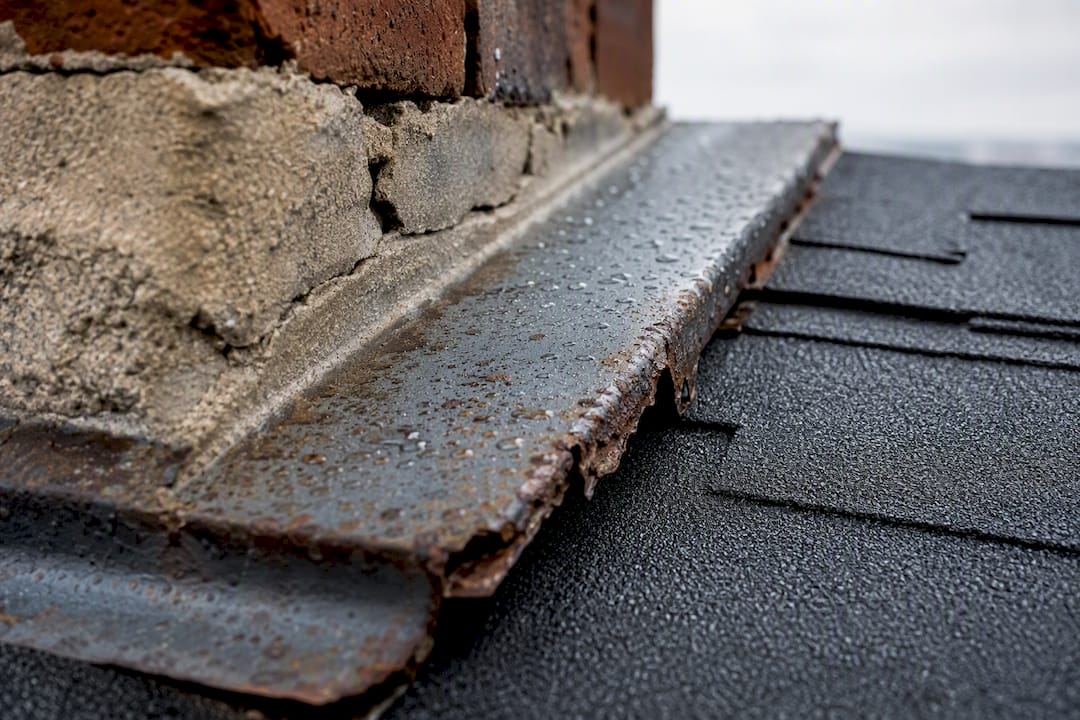
Whatever your climate, the pattern holds: flashing rated for 25 to 40 years under normal conditions can fail a decade early in a region that stacks freeze-thaw cycles, intense UV, salt exposure, or high wind on top of ordinary wear.
An Editorial Take on Chimney Flashing Repair Costs
The conventional advice on chimney leaks treats every stain the same way: call someone, get a caulk gun out, move on. That approach ignores what the six failure modes actually tell you, which is that a $300 mortar crack and a $2,500 missing cricket can produce an identical ceiling stain. Treating them the same is how homeowners end up paying twice.
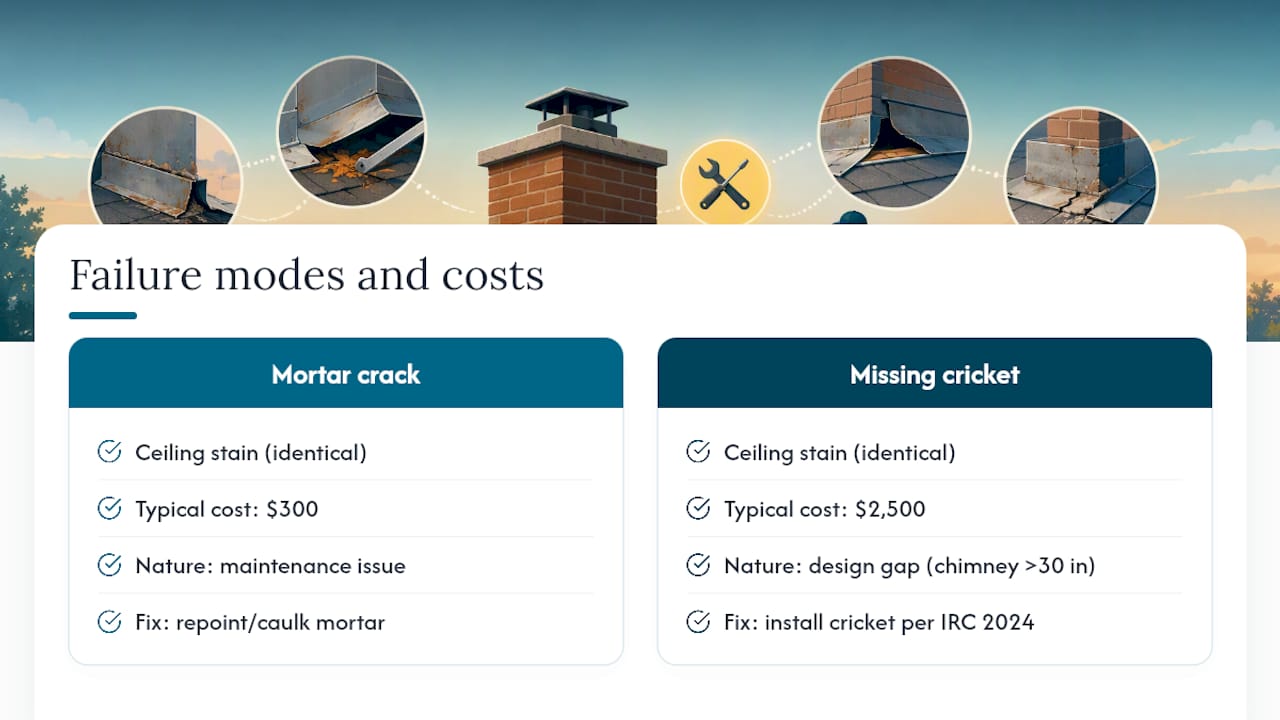
The IRC 2024 cricket requirement is the most underrated piece of this entire topic. Homeowners fixate on the visible flashing and ignore chimney width, yet a chimney over 30 inches without a cricket will keep leaking no matter how well the flashing is installed. That's not a maintenance problem. It's a design gap that only a cricket fixes.
If you take one thing from this, prioritize diagnosis over speed. A contractor who runs a hose test and photographs the actual failure mode before quoting is worth more than one who shows up with a caulk gun already in hand. The cheap fix and the right fix are rarely the same job.
*— Gabbi
How Jhroof Handles Chimney Flashing Repairs in Kent
If you've worked through the checks above and suspect flashing is behind your leak, Jhroof gives you a faster path than trial-and-error DIY patching or waiting on a contractor who skips the diagnosis. As a family-owned, insured roofing company across Kent, every chimney flashing job starts with an attic check and a controlled hose test, not a caulk gun and a guess.

That means you get an itemized quote tied to the actual failure mode, whether that's a simple reseal, a full counter-flashing rebuild, or adding a cricket to a chimney that's been leaking for years without one. Jhroof's 24-hour emergency response covers active leaks that can't wait for a scheduled visit, and every repair comes with a warranty backing the work. If your chimney is showing any of the signs covered above, request a free roofing quote and get a diagnosis before you pay for a repair.
Sources
- Chimney Flashing Leak: 6 Failure Modes & Repair Cost | The Roofing Brief
- Flashing takes flight | Fine Homebuilding
- What should it cost to replace and rebuild a masonry chimney? | Angi