
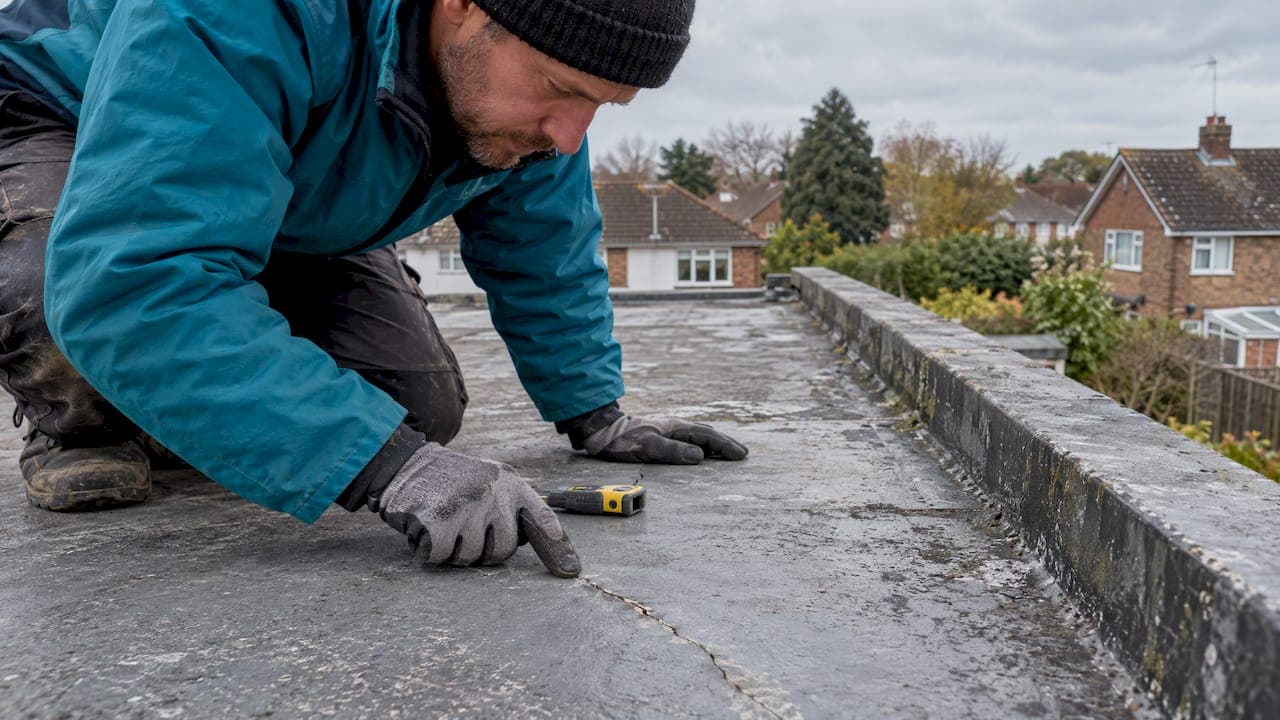
Most small cracks in a GRP or fibreglass roof are fixable with a DIY patch, especially hairline crazing in the topcoat. Your first move is simple: stop active leaks, check inside for damp, and confirm the substrate underneath is bone dry before you touch any resin. If the crack is wider than roughly 10mm or you see an open laminate split rather than fine crazing, that's your signal to bring in a professional.
TL;DR:
- Cracks wider than 10mm or with open laminate splits generally require professional repair rather than DIY patching.
- Moisture trapped beneath the laminate or water ingress can cause laminate failure, making patch repairs ineffective and leading to sooner replacement needs.
- Confirm the deck is dry before patching; a wet OSB3 substrate often signals structural failure and calls for full strip and re-laminate instead of surface repairs.
- Small, hairline surface cracks on a dry, stable deck are suitable for DIY repairs, provided proper surface prep, curing conditions, and quality materials are used.
- Regular maintenance checks, moisture testing, and ensuring proper installation practices can significantly extend the lifespan of a GRP roof and prevent cracks.
Table of Contents
- Fast inspection checklist to triage the crack
- How to tell surface cracks from laminate or substrate problems
- Step-by-step repair procedures for small cracks and for full laminate repairs
- Red flags that mean you should hire a contractor rather than DIY
- Simple maintenance and installation checks that prevent cracks
- Which products, tools, and safety measures to use for GRP repair
- Practical takeaways from field experience with GRP repairs
- What this guide gets right that most advice gets wrong
- Get a professional opinion on your GRP roof repair
- FAQ
- Sources
Fast inspection checklist to triage the crack
Before you decide whether to patch it yourself or pick up the phone, run through this quick check. It takes less than five minutes and tells you which category you're dealing with.
- Look at the crack pattern: fine crazing like a spiderweb is usually cosmetic, while a single open gap often points to laminate failure.
- Check your gutters and the roof surface for standing water, since ponding is a common accelerant of cracking.
- Step inside and scan the ceiling below for damp patches, staining, or a musty smell.
- Place a bucket or tarpaulin over any active leak and avoid walking on the damaged section until you know more.
- Decide: patch now if it's small, dry, and limited to the topcoat; monitor if it's tiny and stable; call a pro if the deck feels wet or the gap is large.
How to tell surface cracks from laminate or substrate problems
Not every crack means the same thing, and getting this wrong before you start repairs can waste a weekend or make the problem worse.
- Read the surface first. Fine, web-like crazing in the topcoat is typically a finish-level issue, while a straight, visible split usually means the laminate underneath has cracked too.
- Try the tap test. Tap gently around the crack with a knuckle or small tool. A solid, consistent sound suggests sound laminate; a hollow or dull sound hints at delamination or trapped moisture beneath the surface.
- Do a poke test. Press a fingernail or plastic scraper into the area. Tackiness or softness in what should be a hard, cured surface is a warning sign, not something a quick coat of resin will fix.
- Check the room below. Wet patches, mold, or a damp smell on the ceiling under the crack usually mean water has already traveled into the structure.
- Bring in a moisture meter or a pro survey if results are mixed. A wet OSB3 deck is one of the most common causes of GRP failure, and if the boards are damp, resin simply won't bond properly, which usually forces a full strip-back and re-lamination rather than a patch.
Step-by-step repair procedures for small cracks and for full laminate repairs
Once you've confirmed the crack is shallow and the deck is dry, the repair itself is straightforward with the right materials and a bit of patience.
Gather your materials and PPE first: resin and matching catalyst, glass-fiber mat, topcoat, a suitable filler or thinned resin for hairlines, nitrile gloves, goggles, a respirator rated for solvent vapors, and dust sheets to protect anything nearby.
- For a hairline crack: sand the area to create a keyed, slightly rough surface, then wipe it clean with a compatible solvent to remove dust and grease.
- Apply a thin layer of filler or thinned resin directly over the crack, feathering the edges so it blends into the surrounding surface.
- Let it cure fully before sanding smooth and applying a matching topcoat; in warm weather this can harden overnight, but cooler conditions may need 24 hours or more.
- For a deeper laminate split: grind back to sound, undamaged laminate and remove every trace of contaminated material, feathering the surrounding edge so the new layer sits flush.
- Lay fresh glass mat using the correct resin-to-catalyst ratio, then allow a full cure with no remaining tack before sanding and applying the topcoat.
Pro Tip: Press a gloved thumb into the cured laminate before moving to the topcoat stage; if it leaves any mark or feels even slightly soft, give it more time rather than rushing the finish.
Temperature and weather matter more than most DIYers expect. Avoid applying laminate when conditions are damp or forecast to turn wet within the cure window, since rain on uncured resin can ruin the repair. Rushing the topcoat before the laminate has properly hardened is one of the most common causes of micro-cracking showing up again within weeks.
Before calling the job done, check it three ways: visually for an even, glossy finish with no pinholes, by touch for a fully hard surface, and with a hose test to confirm no water gets through.

Red flags that mean you should hire a contractor rather than DIY
Some signs point clearly away from a DIY fix, no matter how confident you feel with a sanding block and a tub of resin.
- Trapped moisture under the laminate, confirmed by a hollow tap test or a moisture meter reading.
- Leaks that persist or reappear after you've already patched the area.
- Cracks wider than about 10mm, or several cracks appearing across the roof at once.
- Visible movement in the deck when you walk on it, or upstands and edge details that look poorly finished.
Stripping a wet deck and re-laminating is labor-intensive, which is part of why it costs more than a small patch, and a temporary DIY fix can mask a bigger problem underneath. When you do call a contractor, ask about their moisture testing process, whether the work comes with a guarantee, their insurance cover, and what a full strip-and-re-laminate would involve, including timeline. Our case study on a full flat roof replacement in Kent walks through exactly this kind of scenario, where substrate moisture meant patching alone wasn't an option.
Simple maintenance and installation checks that prevent cracks
Most GRP roof problems trace back to either a damp deck at installation or a lack of ongoing care, both of which are easy to avoid.
- Confirm the OSB3 deck was bone dry before lamination; good installers sheet the deck or schedule around the weather to guarantee this.
- Inspect the roof at least twice a year, in spring and autumn, checking for new cracks, ponding, and lifting edges.
- Keep a simple record of inspection dates and photos, since this often supports any workmanship warranty claim.
- Verify the roof has adequate fall, ideally a minimum build fall of 1:40, along with proper edge termination and correctly spaced deck board fixings.
Our end-of-summer roof maintenance guide covers the seasonal side of this in more detail if you want a fuller routine to follow.
Which products, tools, and safety measures to use for GRP repair
Picking the right materials matters as much as technique, and skipping the safety basics is where most DIY repairs go wrong.
- Choose resin and topcoat from the same manufacturer system to avoid compatibility issues, and always follow the mixing instructions on the label.
- Wear nitrile gloves, goggles, and a solvent-rated respirator, and work in a ventilated space since resin fumes build up quickly indoors.
- Keep skin and eye first aid nearby, since uncured resin and catalyst can irritate on contact.
- Avoid applying laminate below roughly 7.5°C, and never start a repair if rain is forecast within your expected cure window.
Practical takeaways from field experience with GRP repairs
On one flat roof replacement we handled in Kent, what looked like a single surface crack turned out to be widespread substrate moisture, and the only lasting fix was a full strip and re-laminate rather than a patch. That pattern shows up often enough that a moisture meter reading and a check of the fixing layout and edge detail are now standard steps before we quote any GRP repair, because guessing at what's under the surface tends to cost more later.

What this guide gets right that most advice gets wrong
Most GRP roofing advice treats every crack the same way: grind it, patch it, recoat it, done. That approach works for genuine topcoat crazing, but it quietly skips the one question that actually decides the outcome, which is whether the deck underneath is dry. A hairline crack on a bone-dry substrate is a weekend job. The same crack sitting on a damp OSB3 deck is the first visible sign of a failure that a surface patch will only hide for a season or two.
The thresholds matter more than the technique. Knowing that cracks beyond roughly 10mm, or any hollow sound on a tap test, point toward laminate failure rather than cosmetic damage saves you from reapplying resin to a problem that resin can't solve. If we had to pick one habit to prioritize, it wouldn't be mastering the lamination steps. It would be learning to recognize a wet deck before you open a tin of resin, because that single check decides whether you're doing a repair or just delaying a replacement.
— Gabbi
Get a professional opinion on your GRP roof repair
When a crack points to a wet deck, multiple failures, or laminate that's already compromised, a patch kit won't solve the underlying problem. A professional team can carry out moisture testing and a full survey before quoting, so you know exactly what you're dealing with before any work starts, and every job can be backed by insured workmanship.

- Free, no-obligation quotes for repairs.
- Emergency response services for active leaks.
- Workmanship backed by insurance.
If you're dealing with a leaking or visibly damaged GRP roof, our fast roof repair service in Kent is the quickest way to get a qualified assessment and a clear plan, whether that means a patch, a partial re-laminate, or a full replacement.
FAQ
Why do GRP roofs crack?
GRP roofs crack mainly due to a damp or wet OSB3 deck at installation, movement in the structure, or ponding water that accelerates topcoat wear over time. Poor installation, rather than the material itself, is behind most early failures.
What is the average lifespan of a GRP roof?
A well-installed and properly maintained GRP roof can last for many years, with installation quality and regular maintenance being the biggest factors in how long it lasts and how repairable issues remain. Roofs that were installed on a damp deck tend to fail earlier regardless of how well they're maintained afterward.
What should I do if my fibreglass roof cracks?
Stop any active leak with a tarpaulin or bucket, check inside for damp or staining, and confirm whether the deck underneath feels dry before attempting a patch. If the crack is small, dry, and limited to the topcoat, a DIY repair kit is usually enough; if you see signs of trapped moisture, hold off and get a proper inspection.
Can GRP roofs be repaired?
Yes, most hairline and small gel-coat cracks can be repaired with a manufacturer repair kit or a resin-and-mat patch, often bridging gaps up to around 10mm. Deeper laminate splits or a wet substrate usually call for a full strip-and-re-laminate rather than a surface patch, which is work our roof repair and maintenance team handles regularly.
Sources
- GRP fibreglass flat roofs: what it is, what it costs, and why it fails | BuildWiz UK
- Fibreglassroofingkits
- Maintenance tips for a long-lasting GRP roof | Apex