
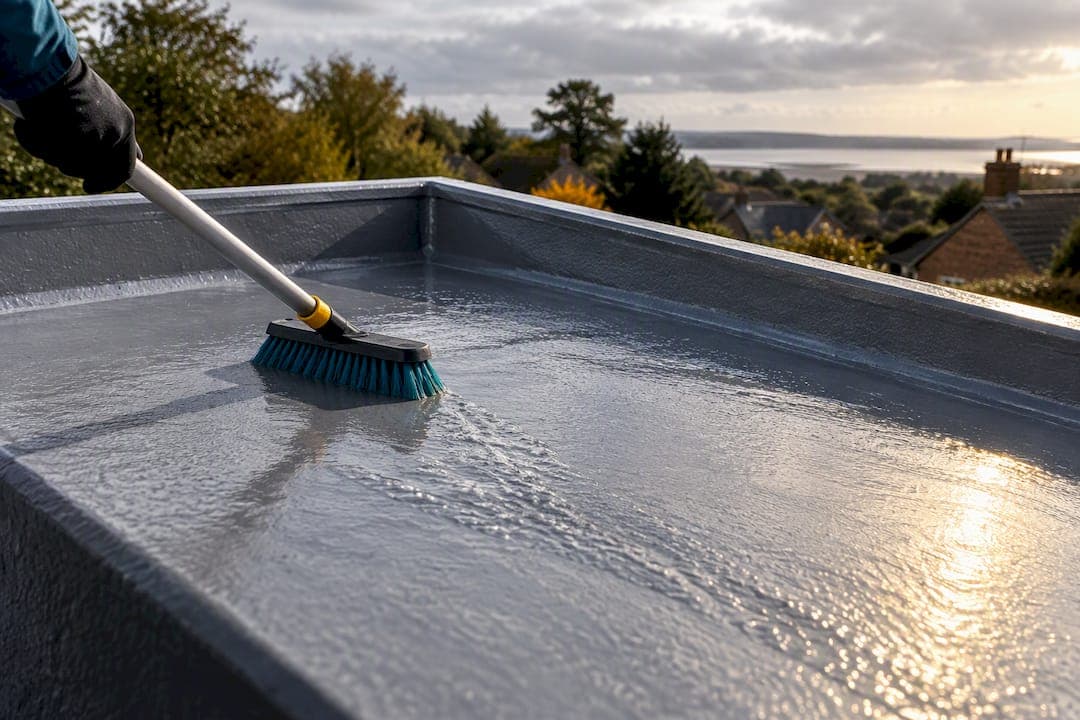
Keeping a GRP roof watertight comes down to three habits: inspect it on a regular schedule, clear debris before it traps moisture, and fix small defects the moment you spot them. Recoating only makes sense when the substrate underneath is dry and sound. None of this requires you to climb onto the roof yourself: routine checks should follow HSE guidance on avoiding unnecessary roof access.
TL;DR:
- Regular inspection should focus on surface imperfections, joints, water management, and organic growth, ideally without climbing onto the roof using remote methods.
- Cleaning must use soft brushes and low-pressure rinses, avoiding bleach and high-pressure washers that can damage the topcoat or trap moisture underneath.
- Repairs require proper surface preparation and correct application conditions, with small DIY fixes suitable only for minor surface issues, while larger repairs should be handled by trained professionals.
- Recoating or overlaying a GRP roof is appropriate only if the substrate is dry, sound, and not extensively damaged; otherwise, full replacement is recommended.
- Safe access for maintenance should prioritize ground-based tools like drones and telescopic cameras, with any close-up work done using approved equipment and proper risk assessments.
Table of Contents
- Inspection checklist: what to check and which tools to use
- Cleaning and topcoat care: safe methods and products to avoid
- Common defects and step-by-step repairs by damage type
- Recoat, overlay or replace: what the substrate tells you
- Safety, HSE guidance and safe access for maintenance work
- Maintenance schedule, expected lifespan and cost factors
- Practitioner perspective: what installers actually check
- What most maintenance advice gets backward
- Professional roofing services can help with inspection, repairs and provide free quotes
- Authoritative manuals and HSE guidance to consult
- Sources
- FAQ
Inspection checklist: what to check and which tools to use
Most GRP roofs fail quietly. A pinhole or a lifted trim rarely causes a leak on day one, but left alone through a few seasons of rain and UV exposure, it will. That is why a fixed inspection routine matters more than reacting to a stain on the ceiling.
Check the roof visually every season, and always after a significant storm. A closer, hands-on inspection once a year catches the details a ground-level look will miss, particularly around trims and outlets where movement and thermal stress concentrate.
- Surface condition: look for pinholes, hairline cracks, blistering or a chalky, faded topcoat.
- Joints and details: check laps, trims, flashings and outlets for lifting or separation.
- Water management: note any ponding areas, blocked outlets or debris buildup.
- Organic growth: moss and algae patches hold moisture against the surface and accelerate wear.
For roofs that are steep, high, or awkward to reach safely, a drone survey or a telescopic inspection camera gives you a clear view without anyone setting foot on the surface. When you do need a closer look at suspect areas, that is the point to bring in a contractor with proper access equipment such as a mobile elevating work platform (MEWP) rather than improvising with a ladder.
Cleaning and topcoat care: safe methods and products to avoid
A GRP topcoat is tougher than it looks, but it is not indestructible. The goal of cleaning is to remove debris and organic growth without stripping or scratching the surface that protects the laminate underneath.
Use a soft-bristle brush and a low-pressure rinse to clear leaves, moss and general grime. Avoid high-pressure washers, which can etch the topcoat and drive water under laps and trims, and skip bleach-based products, which break down the resin's surface finish over time. Where moss or algae keeps returning, a proprietary antifungal roof treatment applied according to its label is a safer route than scrubbing harder.
- Sweep first, rinse second: clear loose debris before you introduce water.
- Mild detergent only: a diluted, non-abrasive cleaner lifts grime without attacking the coating.
- Treat, do not scrub: persistent algae responds better to a fungicidal wash than aggressive brushing.
- Dry fully before any repair work: moisture trapped under a patch or a fresh coat is a common cause of early failure.
Before any spot repair or recoat, the surface needs proper preparation: light sanding to key the area, a wipe with acetone to remove contaminants, and enough dry time to confirm there is no residual moisture in the substrate.
Pro Tip: Check the forecast before scheduling any repair or recoat. Damp or cold conditions on the day of application are one of the most common reasons a GRP repair fails within its first year.
Common defects and step-by-step repairs by damage type
Not every defect calls for the same fix, and getting the order of operations wrong is usually why a repair does not last. Here is the general sequence trade guides recommend for the most frequent issues:
- Pinholes: clean the area, lightly abrade the surface, then apply a thin resin fill and topcoat once cured.
- Hairline cracks: grind out the crack line, reinforce with a strip of fiberglass matting, then laminate over it with resin before topcoating.
- Punctures: cut back to sound material around the hole, build up layers of matting and resin to restore thickness, then finish with topcoat.
- Delamination: remove the loose section entirely, dry the substrate fully, and reapply a full laminate buildup rather than patching over trapped air or moisture.
- Trim failures: re-laminate the trim edge into the main laminate so it is not relying on mechanical fixings alone.
Each of these steps depends on correct cure conditions and the right catalyst ratio. According to the GRP Roof 1010 Application Manual, application should happen at temperatures between 5°C and 30°C, with catalyst (MEKP) mixed within a recommended narrow range, since too little slows curing indefinitely and too much can cause the laminate to crack from excess heat as it sets.
Small DIY kits can be appropriate for a single pinhole or a minor surface scuff on a roof you can safely reach without going onto it. Anything involving structural matting, trim work or an area larger than a small patch is worth handing to a trained installer, because repair guides consistently trace failed repairs back to poor surface prep, incorrect catalyst dosing or work carried out in damp or cold weather.
Recoat, overlay or replace: what the substrate tells you
The decision between recoating, overlaying and full replacement hinges on what is happening beneath the laminate, not just what the surface looks like.
- Recoat or overlay when: the substrate is dry, the board (typically OSB3) is sound, and any damage is localized rather than widespread.
- Replace when: moisture meter readings show saturation, there are signs of timber rot, or the deck has structural movement.
- Ask about guarantees: work carried out by an approved installer using a manufacturer's system typically carries a guarantee that unapproved patch jobs will not.
Manufacturer documentation for systems like FIX-R FLEXI-GRP recommends checking moisture content against a roughly 20% WME threshold before qualifying a roof for overlay, since a saturated deck under a new laminate will keep causing problems no matter how well the top layer is applied.
Safety, HSE guidance and safe access for maintenance work
Roof work carries a real risk of falls, and HSE's roof work guidance is built around one principle: plan the work so you avoid roof access wherever you can. The HSG33 guidance goes further, setting out that any access which is unavoidable needs a risk assessment, a competent operative, and a safe system of work rather than an ad hoc ladder climb.
- Ground-based options first: drone surveys and telescopic cameras cover most routine checks.
- MEWP for close access: a platform gives a contractor a stable, safe vantage point for detailed work.
- Harness systems: reserved for situations where other access methods are not practical.
Pro Tip: Before any contractor goes near your roof, ask for a written risk assessment and method statement, plus evidence of their training. A reputable installer will have both ready without you needing to chase them.
Maintenance schedule, expected lifespan and cost factors
A simple calendar keeps small issues from becoming expensive ones. Aim for a quarterly visual check, a full close inspection once a year, and an immediate review after any severe storm.
- Spring: check for winter damage, clear debris from outlets and gutters.
- Summer: inspect for UV-related fading or chalking on the topcoat.
- Autumn: clear leaves before they accumulate around drainage points; our end-of-summer roofing checklist covers this in more detail.
- Post-storm: a prompt check after high winds or heavy rain catches lifted trims early.
Lifespan varies considerably depending on installation quality, UV exposure and how quickly ponding or standing water gets addressed. Cost, when repairs are needed, is driven mainly by access requirements (ladder versus MEWP versus drone survey), the materials involved, and the size and complexity of the damaged area. Work carried out under a manufacturer-backed guarantee tends to cost more upfront but protects you if a defect resurfaces.
Practitioner perspective: what installers actually check
Working on flat and GRP roofs for over a decade shows that most failures trace back to two things: an edge detail that was never properly laminated, and moisture that got trapped under a repair instead of being dried out first. Our flat roof replacement case study shows how a substrate assessment, not just a surface inspection, determines whether a roof can be recoated or needs a full replacement. Quotes for roof work should start with checking what is underneath, not just what is on top.

What most maintenance advice gets backward
Most guides treat GRP roof care as a cleaning problem: keep it tidy, hose it down, and it will last. In practice, the roofs that fail early almost always fail at the edges, not the field. Trims, upstands and outlet details take the movement and thermal stress that flat middle sections rarely see, yet they get the least attention in most maintenance routines.

The bigger issue is access. Homeowners understandably want to check their own roof, but a five-minute ladder climb to "have a look" is exactly the kind of casual access HSE guidance warns against, and it is also the least effective way to spot a hairline crack or an early pinhole. A drone pass or a telescopic camera check, done consistently, tells you more and puts nobody at risk.
If you take one thing from this guide, prioritize the trims and outlets over the flat expanse, and prioritize safe distance over a closer look you do not need.
— Gabbi
Professional roofing services can help with inspection, repairs and provide free quotes
If climbing onto your roof or diagnosing a defect yourself does not sound appealing, that is exactly the gap a professional inspection fills. We check substrate soundness, not just surface appearance, so you get an honest answer on whether a repair, recoat or replacement is the right call.
- Repairs and recoating: from small patch jobs to full fibre glass roof work.
- Full replacement: where the deck is beyond saving, backed by our own guarantee.
- Emergency call-out: 24-hour response for active leaks.
Request a free, no-obligation quote and we will tell you plainly what your roof needs, with a written method statement for any work we carry out.
Authoritative manuals and HSE guidance to consult
For technical detail beyond this guide, see HSE's roof work safety guidance, the HSG33 publication, and manufacturer manuals like GRPROOF. For a useful maintenance-scheduling template from outside the roofing trade, see this commercial maintenance guide.
Sources
- HSE — Roof work: safety topics
- GRPROOF Application Manual v3.2 (Restec)
- GRP Roof Repair Guide (Rawlins / Rawlinspaints)
FAQ
What is the average lifespan of a GRP fibreglass roof?
Lifespan depends heavily on installation quality, UV exposure and how well ponding and debris are managed over the years. A well-installed, well-maintained GRP roof with prompt repairs typically outlasts one that is neglected or exposed to standing water.
What are some common problems with fibreglass roofs?
The most frequent issues are pinholes, hairline cracks, blistering and lifted trims or flashings, often concentrated at edges and outlets rather than across the flat field. Ponding water and organic growth like moss or algae also accelerate wear if left unaddressed.
Can you recoat a GRP roof?
Yes, recoating is possible when the substrate underneath is dry, sound and free from widespread damage. If moisture checks show saturation or the decking has rotted, replacement is the safer option rather than recoating over a compromised base.
Can you walk on a GRP roof?
GRP roofs are generally designed to be walked on occasionally for maintenance, but HSE guidance recommends avoiding roof access where possible and using ground-based tools like drones or telescopic cameras for routine checks instead. Any necessary access should follow a proper risk assessment and safe system of work.