
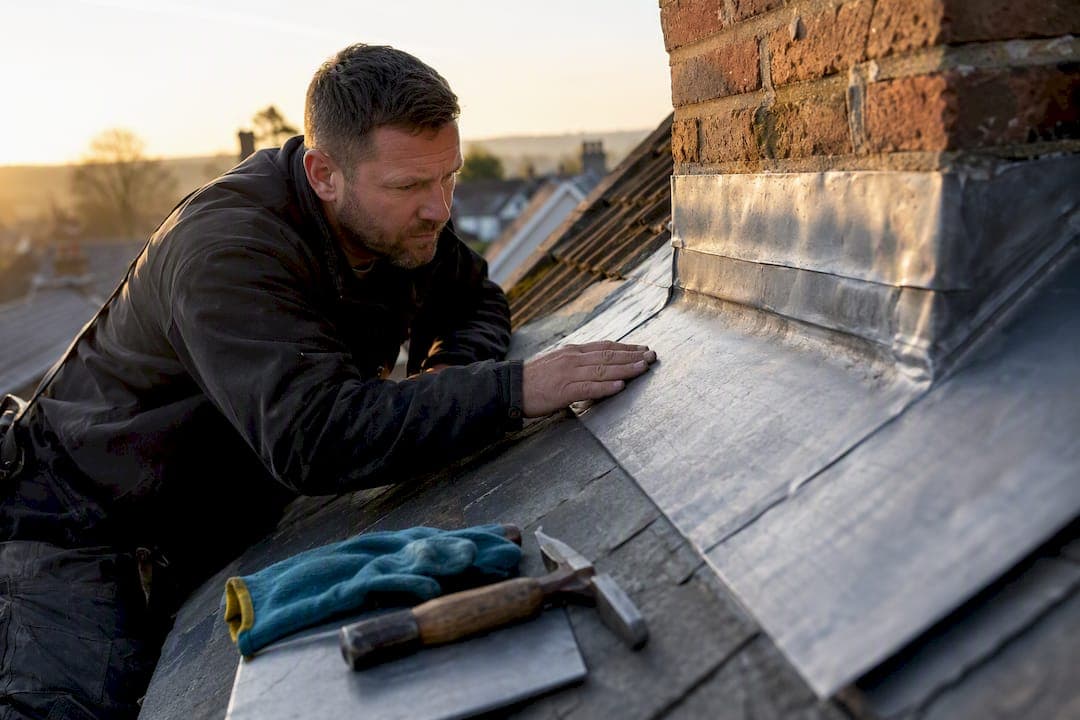
Small splits, pinholes, and single-bay damage in lead flashing can be permanently repaired through specialist welding or a lead-dressed patch, provided the underlying metal and timber are sound. Self-adhesive tapes and general-purpose sealants only buy time. If your flashing is leaking now, stabilize the area and get a professional inspection lined up before the next heavy rain.
TL;DR:
- Small lead flashing splits and pinholes can often be permanently repaired with welding or lead-dressed patches if the underlying material is sound.
- Temporary fixes, such as sealants and tapes, only provide short-term stabilization and can accelerate corrosion if left unaddressed properly.
- Proper permanent repairs require diagnosing root causes like oversized bays and faulty lap dimensions before choosing between welding or full section replacement.
- Using the correct lead code and proper fixings, such as copper or stainless steel clips, is essential to achieve a lifespan of up to 100 years.
- Regular inspections, ideally annually and after storms, help detect early signs of damage and prevent costly underside rot or extensive repairs.
Table of Contents
- How Do You Identify Damage to Lead Flashing?
- Temporary Fix or Permanent Repair: What Actually Works?
- What Does a Permanent Lead Flashing Repair Involve?
- Which Lead Code and Fixings Should You Use?
- What Does Lead Flashing Repair Cost in the UK?
- How Often Should You Inspect and Maintain Lead Flashing?
- How J.H. Roofing Handles Lead Flashing Repairs in Kent
- Why Most Advice on This Topic Misses the Point
- Get a Free Quote for Lasting Lead Flashing Repair in Kent
- Sources
How Do You Identify Damage to Lead Flashing?
Lead does not fail overnight. It fatigues, and the early signs are visible from the ground with a pair of binoculars if you know what you're looking at.
Start with the surface. Vertical or horizontal splits usually appear where the sheet has been stretched past its limit, often at a joint, a corner, or a spot where the lead was fixed too rigidly. A chalky white coating, known as lead carbonate, is normal aging and not itself a fault. Sagging, however, is a warning sign: it means the lead has crept and lost its shape, usually because a bay was cut too long in the first place. Displaced lead clips, missing wedges, and laps that no longer sit flush all point toward fixings that have failed or moved.
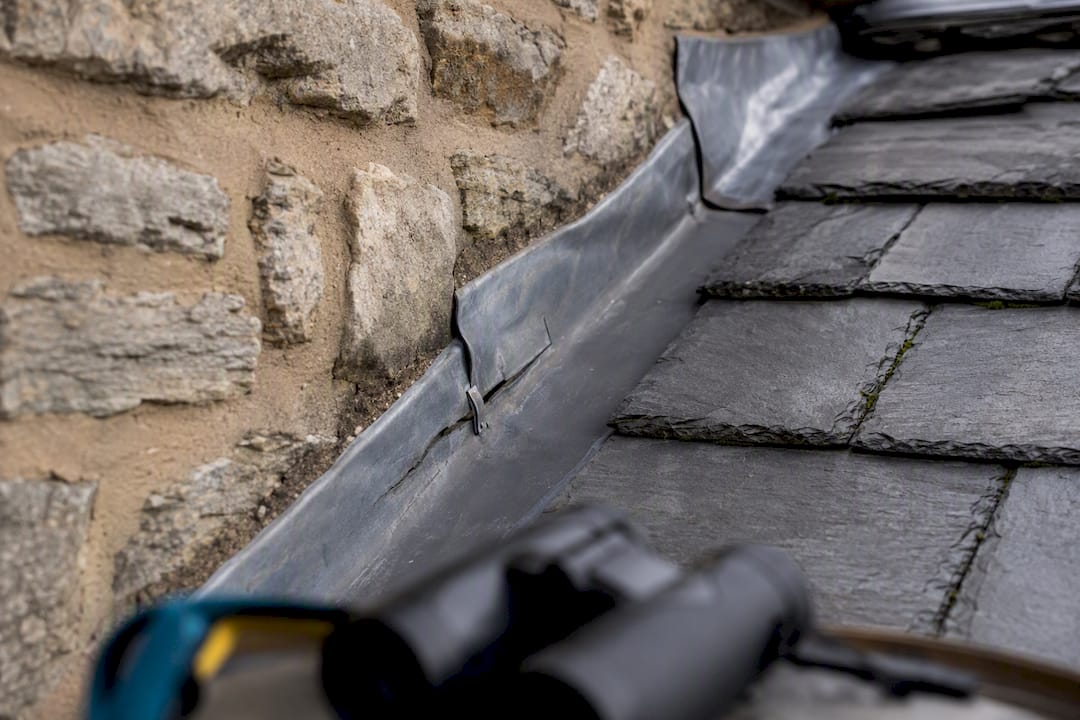
Underside corrosion is the damage you can't see and the one that causes the most expensive repairs. Moisture trapped between the lead and the timber deck rots the substrate from beneath, and by the time it shows as a damp patch on a bedroom ceiling, the timber has often been wet for months. Recurring stains in the same spot after rain, especially near chimneys, dormers, or valley junctions, almost always trace back to a flashing fault rather than a slipped tile.
A few checks you can safely do yourself:
- Scan roof lines from the ground after rain for fresh streaking below flashing joints.
- Check loft timbers near chimneys and valleys for damp smell or dark staining.
- Photograph any visible split or displaced section for reference.
- Note whether a leak appears only during wind-driven rain, which often points to a lap failure rather than a split.
Anything beyond that, working at height, checking chases, or inspecting the underside, calls for a proper roof inspection. Prioritize active leaks and any sign of underside rot over cosmetic splits. Splits are frequently a symptom of a design fault, such as oversized sheets or incompatible mortar, rather than isolated wear, and treating the symptom without addressing the cause is why so many repairs fail a second time.
Temporary Fix or Permanent Repair: What Actually Works?
Not every remedy is meant to last, and confusing an emergency patch for a permanent one is the most common mistake homeowners make with lead flashing repair.
Flashing tape, flashing band, and heat-activated bitumen patches are stabilization tools. They stop water ingress for a matter of months to a few years, but they were never designed to move the way lead does. Lead expands and contracts significantly with temperature, and rigid tape adhesives eventually crack or lift at the edges, letting water track underneath rather than run off. DIY Doctor's repair guidance notes that a well-applied tape patch can last a limited time, generally up to a few years, which makes it a genuine emergency option, not a solution you forget about.
The mismatch is mechanical, not just cosmetic. Lead moves, adhesive doesn't, and trapped moisture underneath a tape patch often accelerates corrosion rather than preventing it. That's the trade-off: a tape fix stops the immediate leak but can mask a growing problem underneath.
Minor defects, small pinholes and short splits under a small size, can often be made permanent without full replacement. A specialist can weld the split closed or dress a matching lead patch over it with proper mechanical bonding, work that building conservation guidance confirms is durable when done correctly, unlike tape.
Where DIY fixes are genuinely appropriate:
- A sudden leak during a storm when no roofer can attend the same day.
- Small pinhole damage on a low-pitch, easily accessible section.
- A short-term measure before a booked professional visit.
Pro Tip: Never attempt a flashing repair on a wet roof or in high wind. Lead becomes slippery when damp, and adhesive patches won't bond properly to a wet surface anyway. Wait for a dry window or call an emergency roofer instead.
What Does a Permanent Lead Flashing Repair Involve?
A proper repair follows a sequence, and skipping steps is usually why "permanent" patches fail within a year or two.
1. Diagnosis. A roofer measures the affected bay, identifies the lead code in use, and checks the chases and pointing above the flashing for movement or crumbling mortar. This step also confirms whether the split is isolated or a symptom of an oversized bay, which is one of the most common root causes according to building conservation research on lead repairs.
2. Surface preparation. The area is cleaned back to bright metal, since any oxidation or grime left underneath will cause a weld or adhesive bond to fail. Trapped moisture is often driven out with gentle heat before any patch goes on, and where mortar has failed, the chase is raked out for repointing later.
3. The repair decision. This is where a competent roofer earns their fee. A welded patch is usually appropriate for damage covering a small percentage of the bay with no underside corrosion. Full section replacement becomes the better call when corrosion has weakened the metal, when the bay exceeds roughly 1.2 to 1.5 meters (a length the Lead Sheet Association's guidance flags as a thermal movement risk), or when the damage covers a large share of the visible sheet.
4. Execution. Lead welding, sometimes called lead burning, fuses new lead directly to the old sheet and is considered the gold standard for a seamless repair. Where welding isn't practical, mechanical bonding with lead-specific adhesives and correctly lapped dressing achieves a similar result. The final steps are patination oil, applied to prevent early white staining and help the patch blend with the surrounding patina, and repointing the chase with a lime or lead-compatible mortar.
5. Verification. A thorough job ends with a leak test, dated photographs for your records, and a short conversation about what to watch for going forward.
The steps in short:
- Diagnose the bay and lead code.
- Prepare the surface to bright metal.
- Choose patch or replacement based on scope.
- Weld or bond, dress, oil, and repoint.
- Test and document the finished work.
Which Lead Code and Fixings Should You Use?
Getting the material specification wrong is a slower failure than a bad weld, but it's just as costly.
Lead is graded by code, which corresponds to sheet thickness, and the correct choice depends on where the flashing sits. Code 4, of moderate thickness, suits most standard residential flashing work, including step flashing and simple aprons, according to Abbey Metals' UK specification guidance. Code 5 is recommended for exposed or high-stress locations, such as valleys or chimney soakers facing prevailing weather. Code 3 covers lighter-duty applications, and the older color-coded terms, Blue for Code 4 and Red for Code 5, still appear in some supplier catalogs.
Lap dimensions matter as much as thickness. Horizontal laps generally need at least 100mm of overlap, and vertical step flashing laps should be sized to the roof pitch. Individual sheet lengths should stay within roughly 1.2 to 1.5 meters, a limit the same Lead Sheet Association-aligned booklet sets specifically to accommodate thermal expansion. Correctly specified and installed, lead flashing can last 60 to 100 years, but that lifespan depends entirely on getting these details right the first time.
Fixings deserve equal care:
- Use copper, brass, or stainless steel clips and lead wedges only.
- Never drive nails or screws directly through a lead sheet.
- Avoid galvanized or aluminum fixings, which corrode faster than the lead around them.
- Skip acid-cure silicone sealants near lead; they can accelerate corrosion.
Lead expands and contracts after installation; overfixing that restricts movement is a common cause of premature splitting, which is exactly why loose clips and wedges outperform screws every time.
What Does Lead Flashing Repair Cost in the UK?
Costs scale with the scope of damage, and the gap between a stopgap and a permanent fix is significant.
Emergency temporary patching with flashing tape or sealant is the cheapest route, often a callout charge plus materials, and it's meant to buy weeks or months, not years. A welded patch to a localized split typically costs more than tape but far less than a full section swap, since it involves an hour or two of skilled labor rather than scaffolding and new material. Full flashing replacement on a chimney or valley section costs the most, driven up by access difficulties, roof pitch, the amount of repointing required, and whether scaffolding or a tower is needed. A free, no-obligation quote is the only reliable way to get a figure for your specific roof.
Several factors push costs higher regardless of the base job:
- Steep pitches or hard-to-reach chimneys requiring scaffold access.
- Underside corrosion discovered once the old lead is lifted.
- Bay lengths that exceed guidance and need re-laying rather than patching.
- Recurrent leaks in the same spot, which usually means a previous repair missed the root cause.
Before hiring anyone, ask for proof of insurance, references from similar jobs, and a written quote that specifies the lead code and fixing method they intend to use. Welding is a genuine skill, and not every general roofer has it, so ask directly whether the quote includes lead burning or a mechanically bonded patch. Most like-for-like flashing repairs fall under permitted development, but larger renewals on listed buildings or conservation areas can involve different consent requirements, so it's worth checking with your local planning authority if your property falls into either category.
How Often Should You Inspect and Maintain Lead Flashing?
A short annual routine catches most problems while they're still cheap to fix.
- Walk the exterior once a year, ideally in autumn, checking for new splits, sagging, or shifted clips at every flashing junction.
- Clear gutters and valleys of debris so water doesn't pool against flashing edges.
- Check the pointing above each flashing run for cracking or gaps in the chase.
- Book a professional inspection roughly every five years, or immediately after a significant storm.
- Reapply patination oil if a repair is under a year old and hasn't yet developed a stable gray patina, since the oil slows early white staining while the surface settles.
- Keep dated photographs and notes of anything you check, which helps a roofer diagnose faster and supports any warranty claim later.
This routine won't catch underside rot, which is why the five-year professional check matters even when nothing looks wrong from the ground.
How J.H. Roofing Handles Lead Flashing Repairs in Kent
A recent flat roof project in Kent illustrates the diagnosis-first approach that separates a lasting repair from a temporary patch. The case study walks through how the team assessed the extent of damage before recommending a course of action, rather than defaulting straight to full replacement.
That same logic applies to leadwork. On-site, the process starts with checking whether a split is isolated or a symptom of a wider issue, then choosing between a welded patch and section replacement based on what's actually found once the old flashing is exposed.
A typical visit includes:
- A ladder or roof-level inspection of the flashing, chase, and surrounding tiles or slates.
- A check of the underside for corrosion or timber damage where access allows.
- Confirmation of the existing lead code before ordering matching material.
- Tools for cleaning to bright metal, welding or bonding, and a supply of patination oil for finishing.
- Photographs before and after, so you have a record of the work carried out.
J.H. Roofing works fully insured across Kent, offers a free, no-obligation quote before any work begins, and runs a 24-hour emergency response service for leaks that can't wait for a scheduled slot. That combination, backed by a 4.7-star Google rating, is what most homeowners are really checking for when they ask a contractor for references.
Why Most Advice on This Topic Misses the Point
The advice circulating online treats flashing tape and a welded patch as two versions of the same fix, differing only in price. They're not. One is a stopgap; the other is a repair. Conflating them is why so many homeowners end up paying twice, once for tape that bought six months, and again for the section replacement they were trying to avoid.
The bigger blind spot is root cause. An oversized bay or a badly cut lap will keep splitting lead no matter how many times you patch the same spot. Guidance from building conservation specialists makes clear that most splits are symptoms of a design fault, yet most homeowner-facing advice skips straight to "how to patch a split" without asking why it split there in the first place.
If you take one thing from this guide, prioritize the diagnosis over the fix. Get someone who understands lead's thermal behavior to look at the bay length and laps before you decide between a patch and a full section. That decision, made correctly once, is what actually gets you toward the material's genuine multi-decade lifespan.
— Gabbi
Get a Free Quote for Lasting Lead Flashing Repair in Kent
If you're weighing a temporary patch against a proper fix, Homeowners in Kent have access to a professional roofing service offering expert diagnosis and repairs. Unlike a generic tape fix that buys a season, our team diagnoses the actual cause, oversized bays, failed laps, underside corrosion, before recommending a welded repair or full section replacement, so you're not paying twice for the same leak.

Every visit starts with a free, no-obligation quote that spells out the lead code and fixing method we'd use, so you know exactly what you're paying for before any work starts. If your flashing is leaking right now, our 24-hour emergency repair service can stabilize the roof the same day rather than leaving you with a tape patch and your fingers crossed. Reach out for a quote and we'll tell you plainly whether your roof needs a patch or a proper replacement.
Sources
- Repairs to Lead Sheet Roofing and Flashings - F C Coote (Building Conservation)
- The Complete Guide to Lead Flashing for UK Roofing Projects – Abbey Metals
- Repairing Lead Flashing | DIY Doctor