
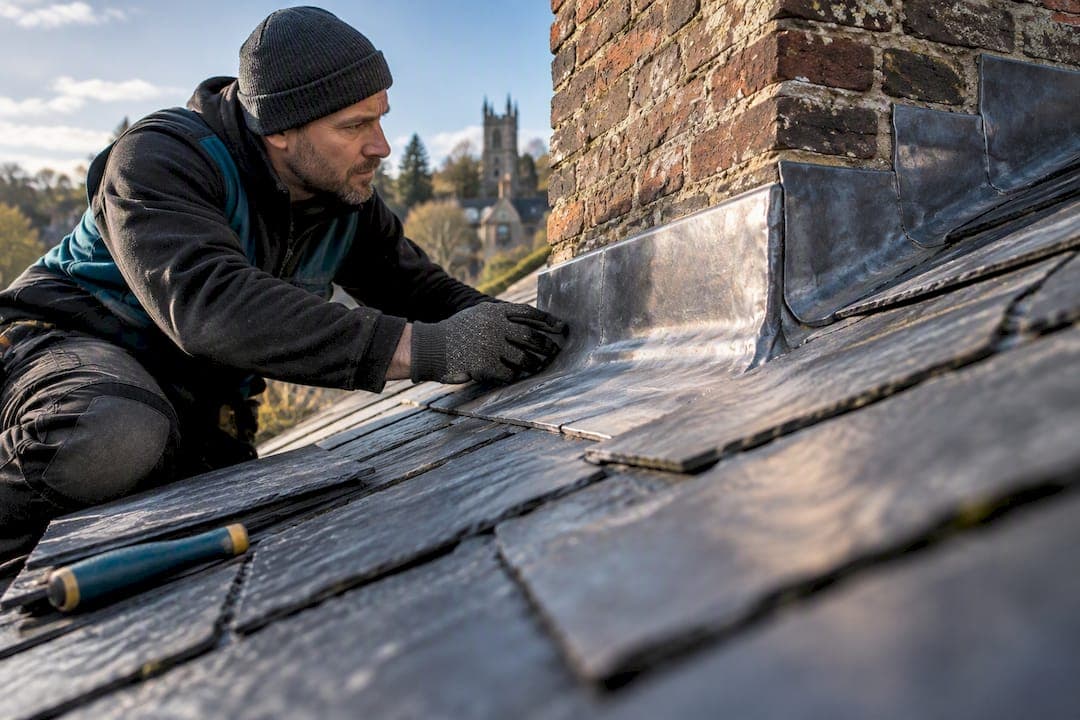
The main lead flashing types are soakers, step (stepped) flashings, apron (continuous) flashings, cover flashings, back gutters, saddles, valley flashings, and ridge or hip flashings. Each one solves a different junction problem, so the right choice depends on where water needs to be redirected and how much the roof moves seasonally. Once you know the junction, you pick the lead code to match exposure and span. Everything below explains how those pieces fit together, what code to specify, and how to spot a poor repair before it costs you twice.
TL;DR:
- Exposed flashings like chimney aprons should be at least Code 4 lead, while Code 3 may only suit hidden soakers.
- Proper detailing involves using a two-part system with fixed base and independent counter-flashing, accommodating lead's thermal movement.
- Sealant along a flashing's top often indicates improper chase depth or failed workmanship, not a proper fix.
- Synthetic or alternative metals can replace lead but must match the specific junction's requirements and be installed exactly.
- A full junction inspection before repair is crucial to identify and fix the actual failure components, not just visible surface damage.
Table of Contents
- What Are the Different Types of Lead Flashing?
- Lead Sheet Codes and Material Choices: Rolled vs. Sand-Cast
- How Thick Should Lead Flashing Be and How Is It Fixed?
- Should You Use Lead-Free Flashing Instead?
- What Should You Ask Your Roofer to Specify?
- A Real Case: When the Visible Repair Isn't the Real Problem
- Why Detailing Beats Thicker Lead
- Get a Proper Leadwork Inspection Before You Pay for a Patch
- Sources
- FAQ
What Are the Different Types of Lead Flashing?
Every flashing type earns its name from the job it does, not just its shape. Knowing which one you're looking at helps you understand why a roofer chose it, or whether a previous repair cut a corner.
- Soakers are small, individual pieces of lead tucked under each slate or tile course at a junction, hidden from view and doing the bulk of the waterproofing work.
- Step (stepped) flashings cover the joint where a sloping roof meets a vertical wall, cut and dressed in a staircase pattern to follow the roofline.
- Apron (continuous) flashings run in one length across a junction, commonly used where a roof slope meets a chimney's front face or a wall runs straight across the slope.
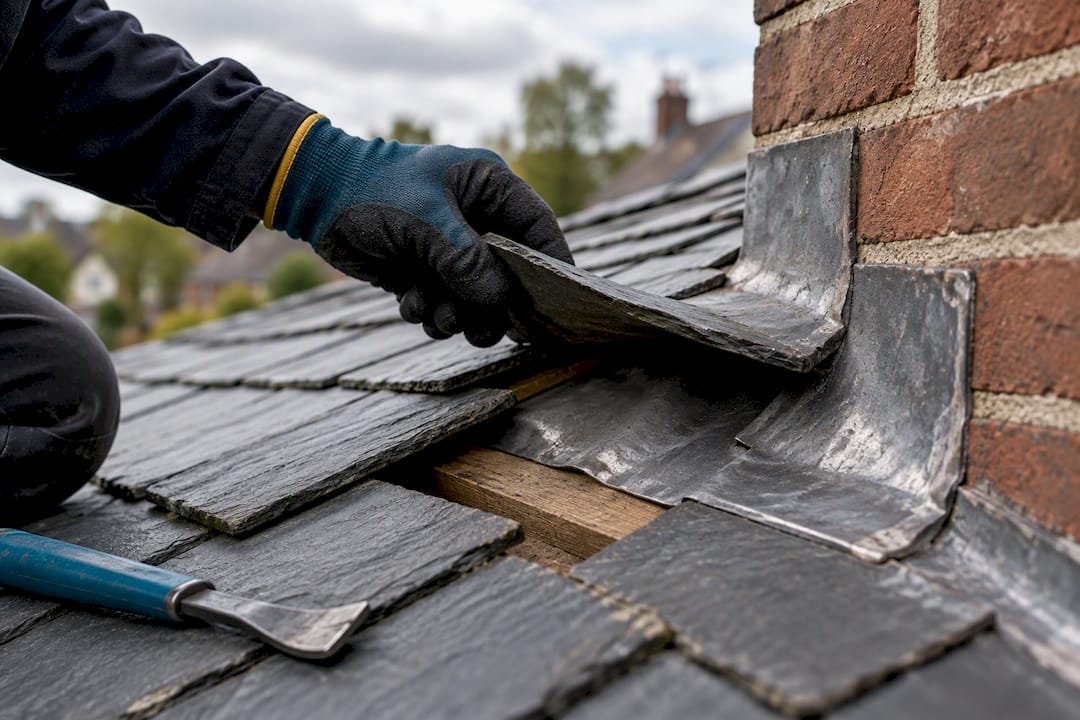
- Cover flashings sit over the top of soakers or step flashings, tucked into a mortar chase in the brickwork, to keep water from tracking behind the primary layer.
- Back gutters collect and channel water around the rear of a chimney or other upstand, often the busiest and most failure-prone detail on the whole roof.
- Saddles perform a similar job to back gutters at smaller or awkward junctions, particularly where a ridge meets a chimney stack.
- Valley flashings line the internal angle where two roof slopes meet, carrying a heavy volume of water during storms.
- Ridge and hip flashings cap the roof's high points, are often paired with dry-fix systems on modern roofs, but are still detailed in lead on period properties.
Chimney junctions rarely rely on just one type. A typical stack combines a front apron, side step flashings running up each slope, and either a back gutter or a saddle at the rear, depending on the chimney's width and the roof's pitch. The Lead Sheet Association's detailing guidance confirms this combination approach is standard practice, not an upgrade.
If you're inspecting your own roof from the ground or a ladder, look for continuous, unbroken metal at every junction, and follow safe cleaning practices for metal roofs to maintain their integrity. Gaps, visible mortar patching over a joint, or a flashing that stops short of a wall's edge are the first signs something was fitted wrong or has failed.
Lead Sheet Codes and Material Choices: Rolled vs. Sand-Cast
Lead sheet comes in two manufacturing types and six standard thicknesses, and mixing up either choice is one of the most common specification mistakes homeowners never catch until a leak reappears.
Rolled lead, sometimes called milled lead, is manufactured to a controlled, consistent thickness through a rolling process. It's the standard choice for the overwhelming majority of modern flashing work because its uniformity makes forming and jointing predictable. Sand-cast lead, by contrast, is poured and has a textured, slightly irregular surface that mimics the appearance of historic leadwork. It costs more and is harder to source, but on a listed building or conservation project, that texture is often the whole point. The Lead Sheet Association notes that when appearance and heritage matching genuinely matter, sand-cast is worth specifying, though the jointing and code selection still have to be right regardless of which lead you choose.
Thickness is where "Code" comes in. Codes run from 3 to 8, and each number corresponds to a specific weight and thickness. Here's how they typically break down in practice:
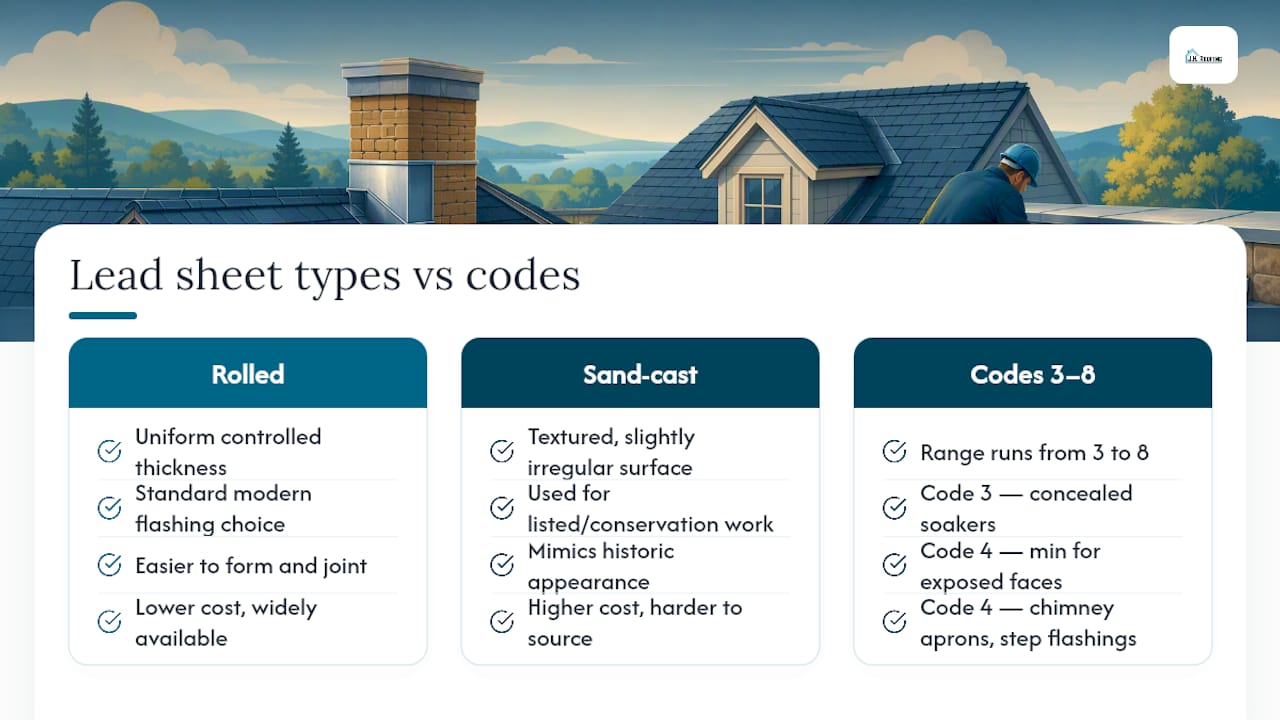
Code 3 works fine for soakers because they're hidden and protected by the covering above them. Code 4 is the practical minimum for anything exposed, including chimney aprons and step flashings, according to LSA guidance. For bossed (dressed into a curved shape) back gutters, Code 5 is the safer call, since that thicker sheet resists splitting when it's worked into shape. The trade-off runs both ways: thinner codes form more easily around complex details, but a code that's too thin on an exposed face will crack or fatigue years before it should.
How Thick Should Lead Flashing Be and How Is It Fixed?
Specification documents that reference BS EN 12588 set out maximum piece lengths, lap sizes, and fixing rules precisely because lead expands and contracts significantly with temperature. Get these numbers wrong and you get buckling, split joints, or flashing that pulls out of its chase within a few winters.
A little sizing and fixing rules come up again and again in trade specifications:
- Maximum individual piece lengths vary by code and application, generally shorter for thinner codes and longer runs on heavier gauge sheet.
- Laps between adjacent pieces need enough overlap, typically a minimum of 100mm, to shed water even under wind-driven rain.
- Upstands at chimneys and valleys should rise well above the anticipated water line, with 150mm commonly cited as a sound minimum for chimney back gutters.
- Fixing clips need spacing tight enough to hold the sheet against wind uplift without over-restricting the lead's natural movement.
- Chases cut into mortar joints for cover flashings should be deep enough, typically around 25mm, to hold the lead securely without relying on sealant to fill the gap.
Pro Tip: If you can see a bead of sealant running along the top of a flashing where it meets the brickwork, that's often a sign the original chase has failed or was never cut properly. Sealant is a stopgap, not a fix.
Movement is the real enemy here, more than exposure or age alone. Lead expands and contracts constantly with temperature swings, and a flashing fixed rigidly along its full length will eventually crack at its weakest point. That's why proper detailing uses a two-part base-and-counter-flashing arrangement: the base piece is dressed into the roof covering, and a separate counter-flashing (or cover flashing) tucked into the wall handles the vertical movement independently. Long continuous runs need built-in joints, called welts or lapped joints, that allow the metal to shift slightly without tearing. A single unbroken 3-meter strip of Code 4 lead across a long apron, with no joint, is a textbook way to guarantee a split within a few years.
Should You Use Lead-Free Flashing Instead?
Lead-free alternatives exist, and for the right project they're a reasonable choice, but they aren't a drop-in swap for every junction lead handles.
The main categories worth knowing about:
- Synthetic flashing products, often flexible self-adhesive membranes, work well for smaller soaker-type details and some cover flashing applications where cost or ease of handling matters more than a traditional finish.
- Manufactured lead-free profiles, molded to mimic step or apron shapes, suit budget-conscious repairs on non-heritage properties.
- Other metals, including aluminum and zinc, appear in some flashing systems, particularly on new-build or commercial work where a lighter material is preferred.
None of these substitutes are automatically interchangeable with lead for appearance or long-term detailing. A synthetic membrane approved for a soaker application isn't necessarily rated for a chimney back gutter carrying a heavy water load, and manufacturer instructions need to be followed exactly rather than assumed. Handling and environmental considerations sometimes push a project toward a lead-free choice too, since lead requires careful handling during installation and disposal. Whatever the material, the junction's function and exposure should drive the decision, not just upfront cost.
What Should You Ask Your Roofer to Specify?
Getting an accurate quote or catching a bad one starts with knowing what to check. Use this sequence when a roofer inspects your property:
- Identify the exact detail being repaired or replaced, naming it specifically (soaker, step, apron, back gutter, valley) rather than just "the flashing."
- Measure the junction length and width so the quote reflects actual material needs, not a rough guess.
- Assess exposure, factoring in the elevation's wind and rain load, since a north-facing sheltered valley and a storm-facing chimney don't need the same code.
- Propose a provisional code based on that exposure, using Code 4 as a baseline for anything exposed and stepping up for bossed or high-load details.
- Verify laps, fixings, and chase depth are specified in the quote, not left as "standard practice" with no numbers attached.
- Require movement detailing in writing, especially a two-part base-and-counter arrangement on any vertical junction.
Watch for red flags in any quote or completed repair: surface-only sealing where lead should be dressed into a chase, mortar simply pointed over a flashing edge instead of proper lead dressing, and aprons or cover flashings with no visible joint on long runs. A roofer who cites Regulation 7 material and workmanship standards and can explain their code choice for your specific junction is giving you a real specification, not a guess dressed up as one.
A Real Case: When the Visible Repair Isn't the Real Problem
A family-owned roofing service with extensive experience often sees this pattern: a homeowner replaces a visibly cracked chimney apron, only for the leak to return within a season. The actual failure was usually in the adjacent soakers or back gutter, hidden beneath the slates. A full junction inspection, not a patch on the visible face, is what actually stops the leak. If you can safely see daylight or staining around a chimney base from a loft space, that's worth checking; anything requiring a ladder against the roofline is a job for a professional.
Why Detailing Beats Thicker Lead
Longevity comes from code, cutting, joints, and fixing working together, not from oversized sheet. Thicker lead never fixes a bad joint.
— Gabbi
Get a Proper Leadwork Inspection Before You Pay for a Patch
A reliable roofing service offers a full junction assessment before any lead goes on the roof, backed by experienced workmanship and a dedicated team.
If your chimney flashing is leaking or you've had a repair that didn't hold, J.H. Roofing's chimney and leadwork repairs start with identifying the actual failed component, whether that's a soaker, back gutter, or step flashing, rather than resealing whatever is visible. For active leaks, the 24-hour emergency response gets someone out fast, and every quote is free and no-obligation. If you're dealing with wider roof issues alongside the flashing, the roof repair and maintenance service covers the full scope in one visit. Get in touch for a free inspection and find out exactly what your roof needs, not what a quick patch can hide.
Sources
- Guide to lead flashing detailing (Lead Sheet Association excerpt)
- F1620-5.2 Leadsheet Coverings and Flashings (specification excerpt)
- Approved Document: Materials and workmanship (Regulation 7)
FAQ
What Are the Different Types of Lead Flashing?
The main types are soakers, step flashings, apron (continuous) flashings, cover flashings, back gutters, saddles, valley flashings, and ridge or hip flashings. Each is named for the specific junction it protects, and chimneys typically combine several types at once.
What's the Difference Between Code 3 and Code 4 Lead Flashing?
Code 3 lead, at roughly 1.32mm thick, is suitable only for hidden soakers protected by the roof covering above them. Code 4, at around 1.80mm, is the minimum recommended thickness for exposed flashings like chimney aprons and step flashings.
What Do Roofers Use Instead of Lead Flashing?
Roofers sometimes use synthetic flashing membranes, manufactured lead-free profiles, or other metals like aluminum and zinc when lead isn't required or practical. These alternatives must be approved for the specific junction and installed exactly to manufacturer instructions, since they aren't always interchangeable with lead for appearance or performance.
What Are the Different Types of Roof Flashings?
Roof flashings generally fall into the same categories used for lead: soakers for hidden slate or tile junctions, step and apron flashings for wall junctions, valley flashings for internal roof angles, and back gutters or saddles for chimney junctions. The correct choice depends on the junction's shape, exposure, and the amount of water it needs to carry.
How Much Does Lead Flashing Repair Cost?
A single tile repair through J.H. Roofing starts from £150, though chimney and leadwork repairs are quoted individually based on the specific detail and code required. Request a free, no-obligation quote to get an accurate figure for your roof.