
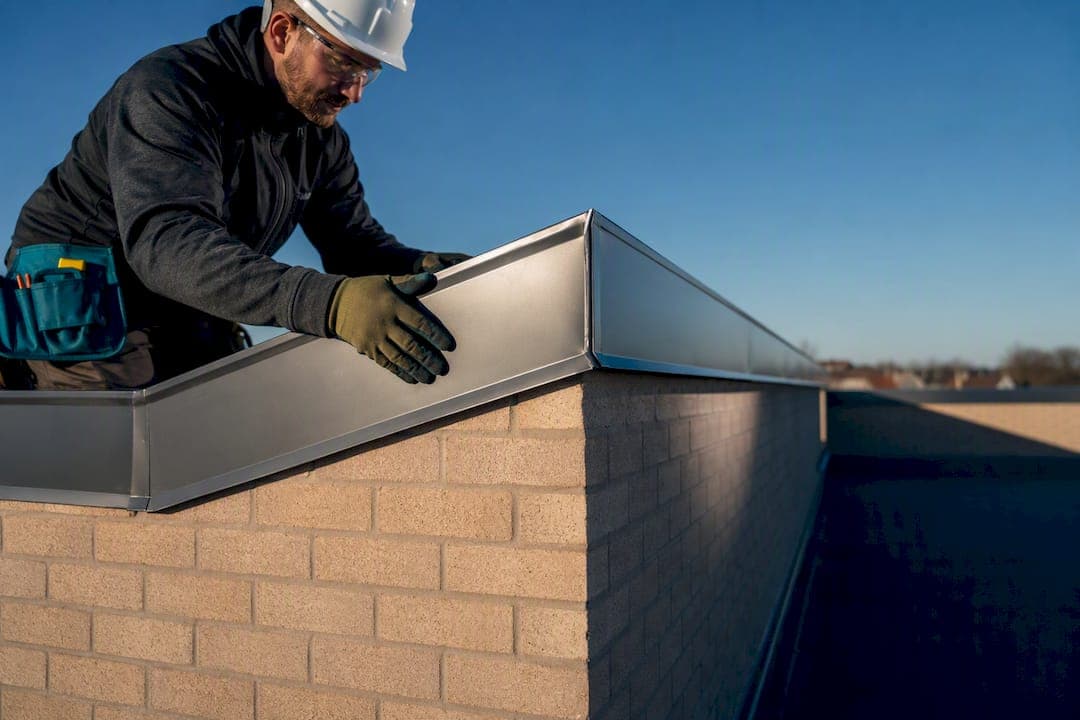
Choose parapet flashing by matching material to exposure and getting the detailing right: aluminium or stainless steel for most commercial work, galvanized steel for budget-conscious jobs, GRP for coastal or corrosive sites, and lead or terracotta where heritage rules apply. The material matters less than you'd think. Reglet depth, DPC continuity, and corner patching decide whether the roof stays dry.
TL;DR:
- Proper reglet depth, continuous DPC, and corner patching are critical to ensuring a long-lasting, leak-free parapet seal, regardless of material choice.
- On coastal or polluted sites, GRP or stainless steel offer better corrosion resistance than galvanized steel, which is only suitable for budget projects away from harsh exposures.
- Installing corners correctly involves relief cuts, rounded edges, and secondary membrane patches to prevent stress concentrations and future leaks.
- Sealant should only be a supplementary measure; mechanical fixings, reglet depth, and DPC continuity carry the primary waterproofing responsibility.
- Regular inspections focusing on fixing points, sealant joints, and DPC integrity are essential for catching early signs of failure before costly repairs.
Table of Contents
- Comparing Parapet Flashing Materials by Performance and Cost
- What Makes Parapet Flashing Actually Waterproof
- How Installation Sequence and Corner Details Prevent Leaks
- Common Parapet Flashing Failures and How to Catch Them Early
- Parapet Flashing Specification Checklist for Tenders
- A Kent Flat Roof Case Study: Parapet Detailing in Practice
- What Specifiers and Owners Should Actually Demand
- Get Parapet Flashing Done Right the First Time
- Sources
- FAQ
Comparing Parapet Flashing Materials by Performance and Cost
The material you choose sets your maintenance schedule for the next 20 to 40 years, so this decision deserves more thought than most specifications give it. Every common option trades off differently between upfront cost, corrosion resistance, and how forgiving it is during installation.
Aluminium dominates modern specification for good reason. It's light enough to reduce fixing loads on the parapet wall, resists corrosion well in most inland environments, and comes in a wide range of factory finishes that hold color for decades. Aluminium is a widely used modern coping solution because it balances durability against weight and cost better than almost any other material. Where it struggles is in heavy salt-spray zones, where pitting corrosion can eventually compromise the finish, and in high-impact areas like loading bays, where dents show up fast.
Stainless steel costs more, sometimes significantly more than aluminium, and that premium only makes sense on specific jobs. Think long-life commercial buildings, sites with heavy foot traffic or mechanical impact risk near the parapet edge, or projects where the client emphasizes long-lasting details with minimal maintenance. Grade 316 stainless resists chlorides well enough for most coastal applications, though it isn't immune to staining without regular cleaning.
Galvanized steel is the workhorse of commercial roofing. It costs less than aluminium in most markets and handles general exposure reasonably well, but the zinc coating has a finite life. Once it's scratched or worn through at fixing points, corrosion starts locally and can spread under the coping before anyone notices. It's a defensible choice on budget-driven commercial re-roofs, less so on anything facing direct coastal exposure.
GRP (glass-reinforced plastic) earns its keep on corrosive or coastal sites where metal corrosion is the dominant risk. GRP coping systems offer strong corrosion resistance and lightweight handling, and manufacturers can mold continuous lengths that reduce joint count compared to metal cappings. The trade-off is mechanical toughness. GRP doesn't dent, but it can crack or chip under sharp impact, and repairs are more specialized than a simple metal patch.
Lead and terracotta belong to a different category entirely: heritage and conservation work. Lead has been used on parapets for centuries because it's malleable enough to dress around irregular masonry and awkward corners without cutting. It's also heavy, expensive per square meter, and requires an experienced leadworker who understands correct bay sizing to avoid thermal cracking. Terracotta coping units match traditional brick parapets aesthetically but need careful bedding and pointing, and they're unforgiving of poor detailing underneath.
PVC and other plastic capping systems sit at the budget end. They're fine for low-visibility, low-risk applications like garden walls or short-life outbuildings, but avoid them on anything exposed to sustained UV or high roof-surface temperatures. Plastic capping tends to become brittle and discolor within a handful of years under strong sun, and once it cracks, water finds its way behind the cap fast.
Decision rules that actually hold up on real projects:
- Coastal or heavy pollution exposure pushes the choice toward GRP or 316 stainless over galvanized steel.
- High foot traffic, plant access, or mechanical impact risk favors metal over GRP.
- Heritage or listed status usually mandates lead or matching terracotta regardless of cost.
- Tight maintenance budgets favor aluminium over stainless unless the exposure class says otherwise.
- Fast-track commercial re-roofs on a fixed budget often land on galvanized steel as the pragmatic compromise.
What Makes Parapet Flashing Actually Waterproof
Material choice gets most of the attention in specification meetings, but the detailing decisions underneath the cap are what separate a roof that lasts 30 years from one that leaks within five. These four elements matter more than the alloy or polymer you pick.
-
Counter flashing and reglet joints. A reglet is a groove cut into the masonry that receives the top edge of a counter flashing, letting it lock into the wall without relying on sealant alone. This detail matters because counter flashing embedded into a mortar joint allows the roof surface to be re-covered later without disturbing the masonry, which saves real money on the next re-roof. Skip the reglet and rely on surface-mounted flashing sealed with mastic, and you're betting the whole detail on a sealant joint that will eventually fail.
-
Horizontal DPC beneath the coping. This is not optional on any parapet detail. Guidance from LABC Warranty states that parapet walls should include a horizontal damp-proof course beneath the coping wherever practicable, formed as a single continuous length rather than pieced together from offcuts. Every joint in that DPC is a potential entry point for water to track down into the wall cavity below. The DPC also needs to tie into the roof membrane's own upstand, not just sit as a separate layer, or you create a gap where water can migrate between the two systems.
-
Drip edge and overhang geometry. The cap needs enough overhang on both the wall face and roof face to shed water clear of the substrate rather than letting it run back under the flashing. Building science guidance on flashing details is built around the principle of directing water "down and out", which sounds obvious until you see how many failed parapets have a drip edge that's flush with the wall face instead of projecting past it. The roof leg of the flashing needs to extend far enough onto the membrane to allow for movement without pulling free, and the wall leg needs enough depth in the reglet to resist wind uplift.
-
Expansion joints and flexible underlay. Parapet walls move. Thermal expansion in a long run of metal capping, differential movement between the wall and the roof deck, and building settlement all place stress on rigid flashing runs. Specify expansion joints at reasonable intervals on long capping runs, and consider a flexible, self-adhering membrane underlay beneath rigid metal coping as a secondary barrier that tolerates movement the metal itself can't absorb.
Get any one of these four wrong and the material choice becomes irrelevant. A premium stainless cap with no reglet and a broken DPC will leak just as reliably as a budget PVC system installed correctly, only it'll cost more to find out.
How Installation Sequence and Corner Details Prevent Leaks
Most parapet flashing failures trace back to workmanship at a handful of predictable points, not material defects. Getting the sequence right, especially around corners, is where experienced installers earn their fee.
The installation generally follows this order:
- Prepare and clean the substrate, removing loose mortar, old sealant, and debris from the wall crown.
- Install the horizontal DPC as a continuous run, lapping joints in the direction of water flow.
- Cut or form the reglet where counter flashing will lock into the masonry.
- Set the flexible underlay membrane over the DPC where a secondary barrier is specified.
- Fix the cap flashing, working from one end and lapping each section over the last in the direction water will travel.
- Form and seal corners before finishing the straight runs on either side.
- Apply sealant only where the design calls for it as a supplementary barrier, not as the primary defense.
Corners are where things go wrong most often. Inside corners need a relief cut so the flashing can fold without tearing at the bend, and that cut needs to be rounded off rather than left as a sharp notch, since a square-cornered relief cut concentrates stress and cracks open over time. Outside corners typically need a separate formed or fabricated corner piece, patched into the adjoining straight runs with a compatible adhesive or welded seam depending on material. On both inside and outside corners, a secondary membrane patch over the relief cut adds real insurance against the concentrated movement that happens at these points.
Fixing strategy depends on the material family. Aluminium and stainless coping typically use hidden clip systems that let the metal expand and contract without visible fastener heads breaking the finish. Galvanized steel is often mechanically fixed with color-matched screws, which is simpler but leaves more penetration points for water to find. GRP systems sometimes use adhesive lamination at joints rather than mechanical fixings, since screws can create stress points in the composite. Whichever system you specify, fastener spacing and type should be documented in the drawings, not left to the installer's judgment on the day.
Sealant deserves a specific note. Use high-temperature, UV-stable sealants rated for exterior exposure, not general-purpose caulk that will chalk and crack within a couple of seasons under direct sun. But treat sealant as a backup, not the primary line of defense. If your detail depends entirely on a bead of sealant to stay watertight, the design has already failed. Mechanical overlap, correct reglet depth, and DPC continuity should be doing the actual work.
Pro Tip: Ask your installer to photograph every corner detail before the cap flashing goes on. It costs nothing and gives you a permanent record of what's underneath if a leak shows up in five years.
Common Parapet Flashing Failures and How to Catch Them Early
Parapet flashing rarely fails all at once. It fails at specific, repeatable points, and knowing what those look like lets you catch problems while they're still cheap to fix.
- Corrosion at fixing points. Galvanized coating wears through fastest where screws or clips penetrate the metal, since that's where the coating gets disturbed during installation. Look for rust staining running down from fixing heads.
- Sealant failure at laps and corners. Sealant that's cracked, shrunk, or pulled away from the substrate is the single most common visible sign of an aging detail, and it's usually the first thing to check during a routine inspection.
- Water ingress at corners. Staining on the interior wall face below a corner almost always traces back to a relief cut or corner patch that's opened up.
- DPC discontinuity. Where a DPC was pieced together from offcuts rather than run as one length, water tracks through the joint over time, often showing up as damp patches well below the parapet itself.
- Freeze-thaw damage in masonry caps. Stone or concrete coping that isn't adequately protected by an overhanging drip edge takes on water, and repeated freeze-thaw cycles spall the surface.
A simple inspection twice a year, once before winter and once after, catches most of these before they become structural. Check fixing points for staining, run a hand along sealant joints to feel for cracking, and look for any daylight visible under lapped joints. Temporary repairs, like resealing a cracked joint, buy time but don't fix an underlying detailing failure. If you're re-sealing the same joint every year, the design needs revisiting, not another tube of sealant.
Cheaper materials front-load your savings and back-load your maintenance cost. A galvanized system might cost less to install but need attention within 10 to 15 years, while a properly detailed aluminium or stainless system, correctly fixed with sound DPC continuity, can run 30 years or more with minimal intervention.
Parapet Flashing Specification Checklist for Tenders
Getting a fair, comparable set of quotes depends on giving every contractor the same specification to price against. A vague scope invites vague pricing, and vague pricing tends to hide corners that get cut later.
Cover these points in any tender or specification document:
- Exposure class — state whether the site is coastal, industrial/polluted, or standard inland exposure, since this drives material selection directly.
- Finish — specify color, coating type, and whether a warranty applies to the finish separately from the substrate.
- Fixing type — hidden clip, mechanical screw fix, or adhesive lamination, along with spacing.
- Movement allowance — expansion joint frequency on long runs and the tolerance built into lap joints.
- Interface with the roof membrane — how the DPC and cap flashing tie into the existing or new roof covering.
- Warranty terms — material warranty length separate from installation workmanship warranty.
As dimensional starting points, most cap flashing details use roughly 50mm of overhang on the roof leg and a moderate range on the wall leg, though these numbers should always be checked against the specific roof system and manufacturer's fixing details rather than treated as fixed rules.
When comparing contractor quotes, ask for the material grade in writing (which stainless grade, which aluminium alloy), test certificates where relevant, and photographic documentation of DPC and corner details during installation, not just before-and-after shots. A contractor unwilling to commit these details to paper is telling you something about how the job will actually run.
A Kent Flat Roof Case Study: Parapet Detailing in Practice
The flat roof replacement project J.H. Roofing completed in Kent put a lot of this detailing into practice on a real parapet wall carrying years of accumulated leak damage. The original coping had discontinuous DPC and sealant-dependent joints, the exact failure pattern covered above. The replacement specified continuous DPC beneath new coping, properly formed corner patches, and mechanical fixing documented at every stage.
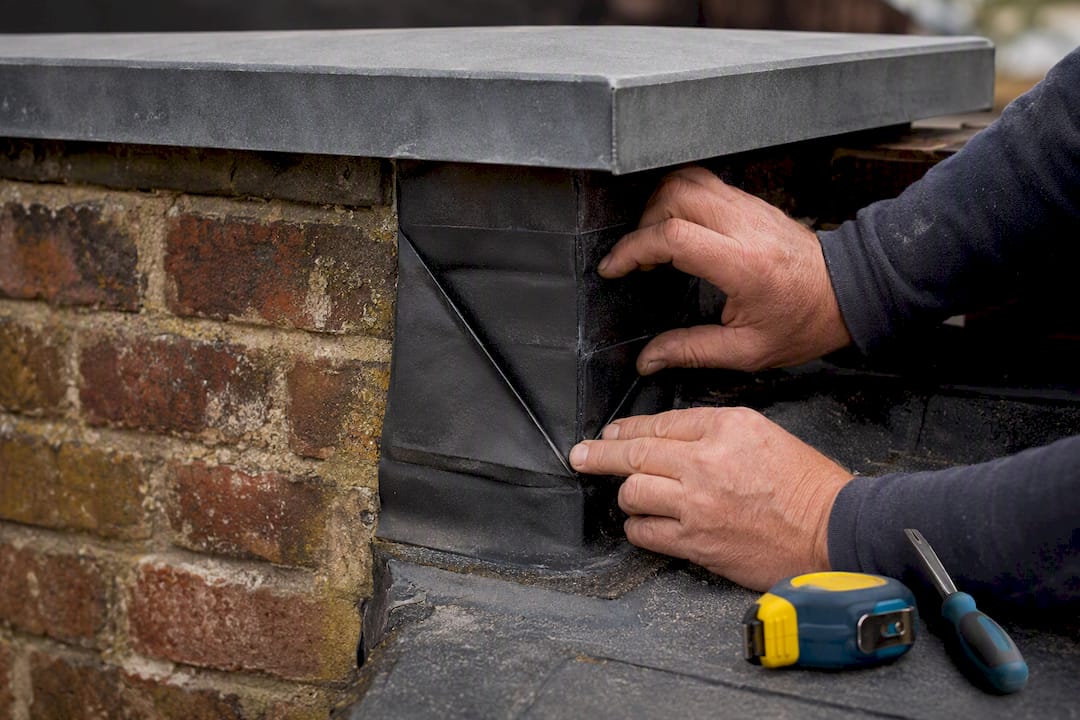
This kind of detailing work is central to roofing services offered for residential and commercial properties in Kent. The company's roofing blog covers further practical guidance for property owners weighing similar decisions. For anyone dealing with a parapet showing early signs of failure, a free, no-obligation quote offers a documented assessment before committing to a repair scope.
What Specifiers and Owners Should Actually Demand
Most parapet flashing disputes trace back to specifications that left too much to interpretation. If you're specifying the work, insist on three things in writing: DPC continuity as a single run wherever practicable, documented movement allowances on long capping runs, and named material grades with fixing details drawn, not described.
If you own the building and you're hiring the work out, ask for three things in return: a stated inspection schedule for the first few years, photographic documentation of corner and fixing details before the cap goes on, and warranty terms that name both the material and the installation separately.
Pro Tip: On heritage parapets, favor materials that match the original fabric, lead over aluminium, terracotta over GRP, and prioritize reversible detailing that a future conservator can undo without damaging the historic masonry underneath.
— Gabbi
Get Parapet Flashing Done Right the First Time
Reading a comparison table only gets you so far. Getting the reglet depth right, the DPC continuous, and the corners patched correctly takes hands-on experience with the materials covered here, and that expertise is available for property owners and managers who need the work done rather than just specified.

J.H. Roofing's roofing services cover parapet flashing repair and replacement alongside flat roofing, chimney and leadwork, and emergency call-outs. A free, no-obligation quote typically includes a documented inspection of existing coping, photographs of any fixing or DPC issues found, and a recommended detail matched to the building's exposure and construction. If you're dealing with an active leak rather than a planned upgrade, the fast repair service covers urgent parapet failures with a 24-hour emergency response. Get in touch for a quote and a straight answer on what your parapet actually needs.
Sources
- Top Parapet Coping Options for UK Projects
- Guide to creating weatherproof parapet walls
- BSC Information Sheet 303
- What Is Flashing on a Roof? 8 Types Explained | TRB
FAQ
What Is Parapet Flashing?
Parapet flashing is the sheet metal, membrane, or composite detail installed over and around a parapet wall's coping to stop water from penetrating the wall top and tracking into the building below.
What Are the Common Problems With Parapets?
The most frequent issues are corrosion at fixing points, sealant failure at laps and corners, water ingress where corner patches or relief cuts have opened up, and discontinuous DPCs that let moisture track through the wall over time.
What Are the Different Types of Parapet Coping?
Common coping materials include aluminium, stainless steel, galvanized steel, GRP, lead, PVC, terracotta, and stone or concrete, each suited to different exposure levels, budgets, and heritage requirements.
What Is a Parapet Kicker?
A parapet kicker (sometimes called an upstand or turn-up) is the raised edge of roofing membrane that runs up the base of the parapet wall, providing the vertical barrier the cap flashing and counter flashing tie into to complete the watertight seal.