
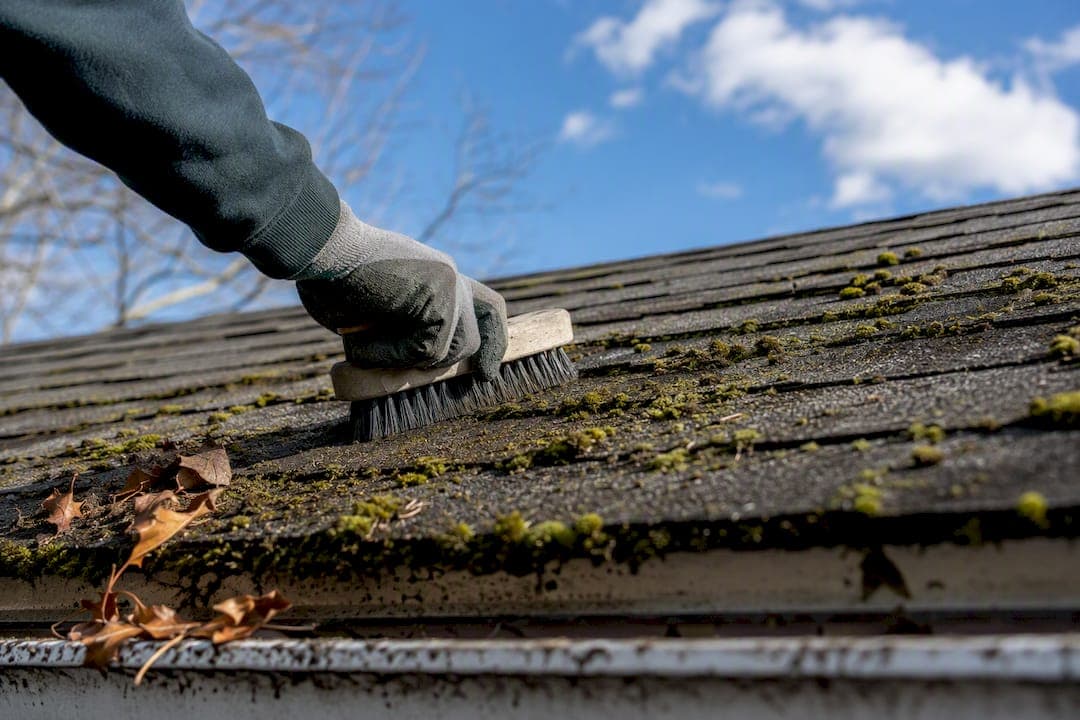
The safest and most effective way to handle roof moss removal is a low-pressure soft wash or a slow-acting biocide, followed by gentle downward brushing once the moss loosens. Skip this and go DIY if your roof is steep, two stories or higher, or covered in heavy, long-established growth. Done right, results hold up for a few years, depending on how well you keep up with prevention afterward.
TL;DR:
- DIY moss removal is feasible for flat, low-pitch roofs and in good condition, but dangerous or steep roofs require professional attention.
- Gentle downward brushing after chemical treatment, avoiding pressure washers, is key to preventing damage and ensuring longer-lasting results.
- Zinc sulfate and potassium salts are the safest chemicals for moss control, but zinc should be avoided if copper gutters are present.
- Preventing moss regrowth depends on trimming shade, gutter maintenance, and installing metal strips or algae-resistant shingles during re-roofing.
- Professionals offer inspections that identify hidden damage and improve treatment longevity, especially for roofs with existing structural issues.
Table of Contents
- Why Moss Matters: The Real Risk to Your Roof
- How Do You Safely Remove Moss From a Roof Yourself?
- What Chemicals Actually Kill Roof Moss?
- How Can You Stop Moss From Coming Back?
- When Should You Call a Professional for Roof Moss Removal?
- Trusted Roof Moss Removal Across Kent
- What the Research Actually Supports (and Where Advice Goes Wrong)
- Jhroof: A Safer Path When the Job Is Bigger Than a Weekend
- Sources
Why Moss Matters: The Real Risk to Your Roof
Moss looks like a cosmetic nuisance, but it behaves more like a slow-motion sponge sitting on top of your roofing materials. It traps leaves, pollen, and grit against the surface, then holds moisture there long after the rest of your roof has dried out. That extended dampness is where the real damage starts.
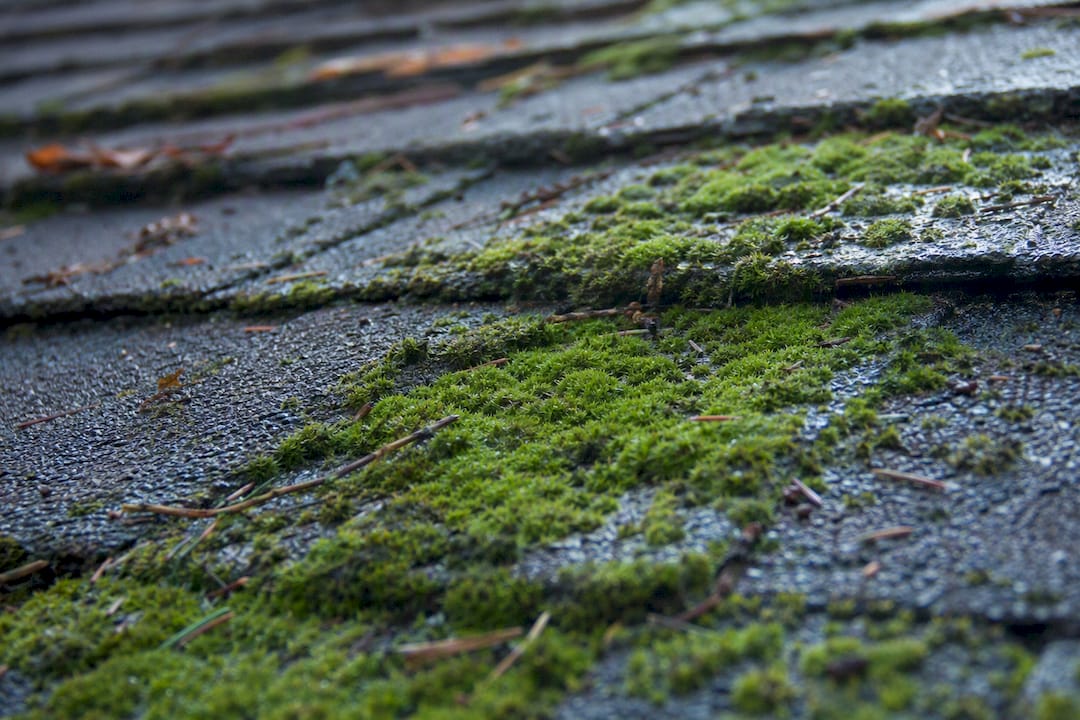
Oregon State University Extension points out that moss encourages fungal decay and can physically lift shingles, opening a path for water to reach the underlying deck. Once water gets past the shingle layer, you're no longer dealing with a moss problem. You're dealing with a rot problem, and those repairs cost a lot more than a weekend of cleaning.
Different roofing materials respond to moss differently:
- Wood shakes and shingles rot fastest, since the material itself absorbs the trapped moisture.
- Asphalt shingles lose their protective granules faster under moss, which shortens the roof's lifespan.
- Clay and concrete tiles hold up structurally longer, but moss roots can work into surface pores and cause flaking over time.
- Metal roofing resists rot but can trap moss in seams and fasteners, leading to localized corrosion.
Moss doesn't stay put, either. Clumps break off and wash into your gutters, where they combine with leaf litter to create blockages that send water spilling over the fascia instead of down the downspout. That overflow soaks siding, saturates foundation soil, and turns your front steps or deck boards slick and dangerous in wet weather.
A quick inspection cue worth remembering: if you spot dark streaking alongside green or brown moss patches, you may be looking at algae growth as well, which behaves differently and often needs a separate approach. Curling shingle edges or sagging patches near moss clusters are signs the damage has already started underneath, and that's a cue to get a professional set of eyes on the roof rather than reaching for a brush.
How Do You Safely Remove Moss From a Roof Yourself?
DIY roof moss removal is realistic for many single-story homes with a walkable, low-to-moderate pitch and roofing in reasonably good condition. It is not realistic for steep roofs, multi-story homes, or roofs where you can already see lifted shingles or soft spots. Here's how to do it without turning a moss problem into a roof-replacement problem.
Check the roof and your safety setup first
Before you touch a ladder, walk the perimeter of your house and look up. A roof pitch under about 4:12 (rising 4 inches for every 12 inches of horizontal run) is generally considered walkable for someone comfortable on a ladder. Anything steeper, or any roof over one story, moves into "call a professional" territory fast, which we cover in more detail further down.
Safety basics that matter more than people assume:
- Use a sturdy extension ladder set at the proper angle, with someone else at the base if possible.
- Wear rubber-soled shoes with real tread, never sneakers or work boots with worn soles, since a moss-covered roof is genuinely slippery even before you wet it.
- Use a roof harness and anchor line if you're working anywhere near the roof edge or on a pitch that makes you uneasy.
- Carry sprayers and brushes up in a bucket clipped to your belt or hauled by rope. Don't climb with tools in your hands.
- Work only on a dry, calm day. Wind and wet shingles are a bad combination on a ladder.
The step-by-step process
- Clear the gutters first. Loose debris and standing water in the gutters will just catch the moss you knock loose later, so start here.
- Apply your chosen treatment from the base of the slope upward, working from a ladder or the lower edge of the roof rather than walking the whole surface. Spraying upward lets gravity carry the solution down through the moss.
- Let the treatment sit. Dwell time matters more than most people expect. Extension guidance on safe DIY roof moss removal recommends letting a diluted biocide work for the time stated on the label, sometimes several days, rather than rushing straight to scrubbing.
- Brush gently, and always downward. Once the moss has visibly browned and loosened, use a soft-bristle brush and pull it down the slope in the direction water naturally flows. Never scrub side to side, and never dig at the roots with a scraper.
- Clear the debris with a leaf blower or a garden hose on a low-pressure setting. This is the step people get wrong most often, and it's worth repeating: a pressure washer is not the tool for this job.
- Let the weather finish the job. Rain over the following weeks will rinse away the last of the dead moss without any extra effort from you. Trying to force every last fragment off in one afternoon does more harm than good.
Tools and materials worth having on hand
- Pump sprayer (2 to 4 gallons) for even, low-pressure application of your treatment solution.
- Soft-bristle brush on an extension pole, specifically labeled for roofing rather than deck or masonry use.
- PPE: rubber gloves, eye protection, and a respirator mask if you're mixing concentrated chemicals.
- Tarps or plastic sheeting to protect gutters, downspouts, and nearby plants from runoff.
- A garden hose with a fan nozzle, not a pressure washer wand, for the final rinse.
The don'ts here matter as much as the do's. Pressure washers strip the protective granules off asphalt shingles and can force water up under the shingle edges, according to guidance from Oregon State University Extension on wood shingle and shake roof care, which explicitly warns against high-pressure cleaning. Wire brushes and metal scrapers are just as risky on tile and wood shake, since they gouge the surface and create new entry points for water. Even on asphalt, aggressive side-to-side scrubbing lifts shingle tabs that were never designed to flex that way.
Timing changes your odds of success, too. Late summer through autumn tends to be the best window in most climates, since the roof surface is dry enough to work on safely and treatments get a chance to dwell before winter rain arrives. Trying to treat moss during a wet spring often means the biocide gets diluted and washed away before it finishes the job.
Pro Tip: Don't judge your work by how the roof looks the day you finish. Dead moss often stays put for two to three weeks before rain finally rinses it clear, so resist the urge to go back up with a brush the following weekend.
What Chemicals Actually Kill Roof Moss?
Three product categories cover almost every homeowner situation, and picking the right one depends on your roof material, your landscaping, and how much moss you're dealing with.
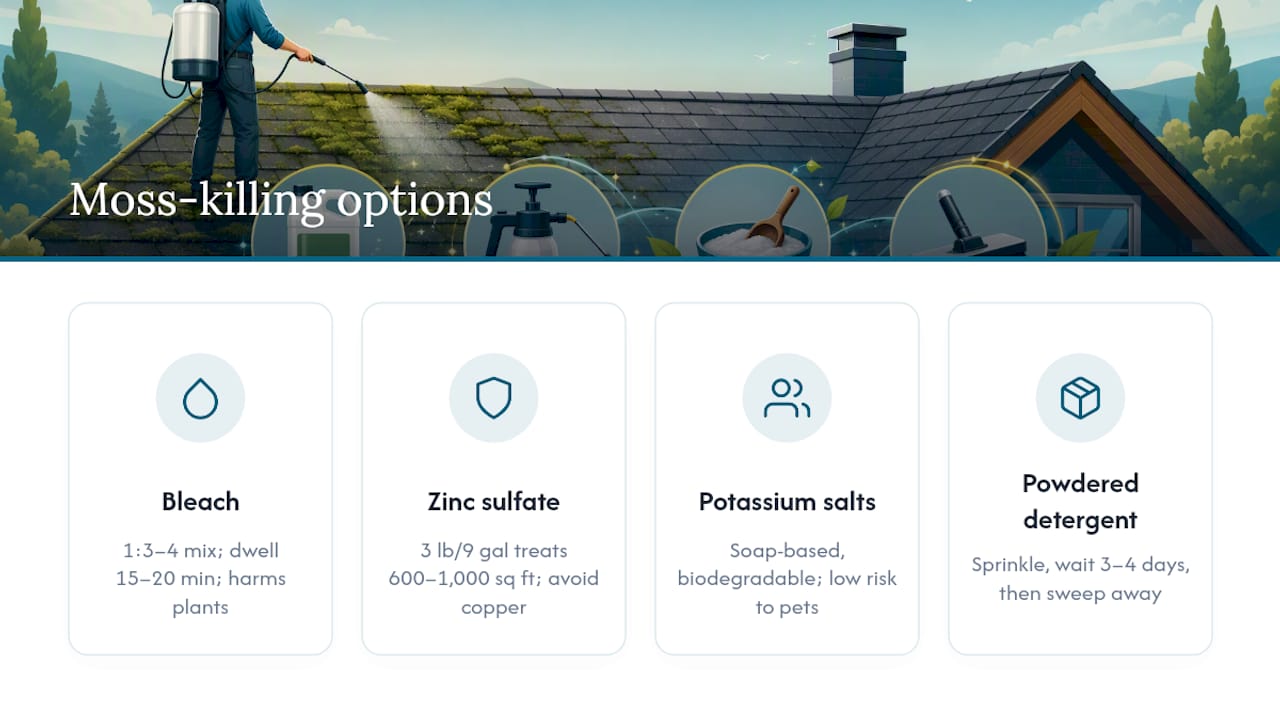
Household bleach (sodium hypochlorite) is the most common DIY option because it's cheap and already sitting under most kitchen sinks. A typical approach mixes one part bleach to roughly three or four parts water, applied with a pump sprayer and left to dwell for 15 to 20 minutes before a gentle rinse. It works fast, but it's hard on nearby plants and lawn, and it can discolor some roofing materials if overused. Soak plant beds with plain water before and after application, and drape plastic sheeting over anything you can't move.
Zinc sulfate is the extension-recommended standard for a reason. Oregon State's guidance on maintaining a moss-free roof gives a specific ratio: 3 pounds of zinc sulfate per 9 gallons of water treats roughly 600 to 1,000 square feet of roof. For heavier, established moss, a stronger mix (1 pound per 3 gallons) covers less area but hits harder growth more effectively. One important caution: skip zinc sulfate entirely if your home has copper gutters or copper flashing, since zinc actively corrodes copper over time.
Potassium salts of fatty acids are the option worth reaching for if you have pets, kids, or garden beds close to the runoff zone. These soap-based products kill moss by breaking down its cell membranes rather than through the same chemical burn as bleach, and extension sources note they're biodegradable and pose minimal risk to people and animals when used as directed.
For smaller, isolated patches, some regional fact sheets, including one from Clean Water Services, suggest an even lower-toxicity route: sprinkling powdered detergent directly onto the moss and sweeping it away after three or four days once it's dried out. It's slower, but it's a reasonable option for a small patch of shaded moss near a chimney or vent stack.
Whatever you choose, read the manufacturer's label fully before mixing anything. Wear gloves and eye protection, and always rinse your sprayer and any hoses thoroughly after use so residue doesn't corrode fittings or contaminate the next batch you mix for a different job.
How Can You Stop Moss From Coming Back?
Removing moss once solves today's problem. Stopping it from returning means changing the conditions that let it grow in the first place, since moss needs shade and sustained moisture to establish itself.
- Trim back overhanging branches so more direct sunlight reaches the roof plane. Moss struggles to establish itself on surfaces that dry out quickly between rain events.
- Clean gutters and valleys at least twice a year, since trapped leaves and needles hold the moisture that gives moss a foothold in the first place.
- Clear debris off the roof surface itself, not just the gutters. Pine needles and leaf litter that pile up in valleys or behind chimneys create the exact damp, shaded pockets moss prefers.
- Consider zinc or copper strips at the ridge line next time you replace your roof. Rainwater washing over these metals carries trace amounts down the slope that discourage regrowth for years.
- Ask about algae-resistant shingles if a full re-roof is on the horizon; many manufacturers now embed copper granules directly into the shingle for the same passive protection.
A twice-yearly visual inspection, once in spring and once in early fall, catches new growth while it's still small enough to spot-treat rather than requiring a full treatment cycle. Extension Service guidance on removing roof moss backs pruning and debris removal as the primary long-term defense, more so than any chemical treatment on its own.
Pro Tip: If one side of your roof always grows moss faster than the other, that's usually your north-facing or most-shaded slope. Focus your prevention effort there instead of treating the whole roof equally.
When Should You Call a Professional for Roof Moss Removal?
Some roofs simply aren't safe or practical for a homeowner to treat, and knowing the line matters more than any product choice.
Call in a professional when you're dealing with:
- A roof pitch steep enough that standing on it without fall protection feels unsafe.
- Any home taller than one story, where a ladder alone doesn't give you safe, stable access to the full roof surface.
- Moss that's widespread, deeply established, or has been growing for multiple seasons without treatment.
- Visible signs of existing damage, like lifted shingles, soft spots, or staining on interior ceilings.
- Any uncertainty at all about your own footing, equipment, or the treatment process.
Professional crews typically use the same soft-wash or slow-acting biocide approach a careful homeowner would, just at a larger scale and with better access equipment. What you're really paying for is the inspection that comes with it: a thorough look at flashing, underlayment, and gutter condition that spots problems before they turn into leaks. Industry guidance on professional roof moss removal notes that soft-wash treatments combined with moss-proofing measures tend to hold up for two to three years, longer than most DIY results, because the application is more even and often paired with preventive treatments applied the same visit.
Cost varies with roof size, pitch, material, and how much existing damage needs addressing alongside the cleaning itself. The most reliable way to get a real number for your specific roof is a free, no-obligation quote rather than guessing from a general price range. When you're vetting a contractor, ask directly about insurance coverage, the exact treatment method they use, whether they guarantee results, how they protect nearby plants and landscaping, and what cleanup looks like when the job is done.
Trusted Roof Moss Removal Across Kent
Jhroof has spent over 10 years handling roofing work across Kent, and moss-related calls are some of the most common inspections the team runs, especially heading into fall and after a wet winter. The company is fully insured, backed by a 4.7 star Google rating, and offers 24 hour emergency response for the cases that can't wait, like a lifted shingle discovered mid-storm.
Homeowners typically reach out to Jhroof for:
- A full roof inspection to check for hidden damage under existing moss growth.
- Professional soft-wash treatment on steep or multi-story roofs that aren't safe to DIY.
- Repairs to shingles, flashing, or underlayment once moss has caused actual damage, similar to the kind of restoration work detailed in Jhroof's flat roof replacement case study.
- Full re-roofing when moss damage has gone untreated long enough to compromise the deck.
If you're not sure whether your roof needs treatment, repair, or a full inspection, the fastest way to find out is a free quote request with no obligation attached.
Written by Gabbi.
What the Research Actually Supports (and Where Advice Goes Wrong)
Most roof moss advice online treats removal as a one-time chore: spray it, scrub it, done. The extension research tells a different story. Moss removal without addressing shade, gutter debris, and drainage is just a temporary fix, since the same conditions that grew the moss the first time are still sitting there waiting for the next wet season.
The bigger blind spot is patience. Homeowners want their roof looking clean the same afternoon, so they scrub harder than they should or reach for a pressure washer against every warning from roofing professionals. The research consistently favors a slower approach: apply, wait, brush gently, then let rain finish the rinse over several weeks. That's not the satisfying answer, but it's the one that doesn't cost you a new roof deck five years early.
If you take one thing from this guide, prioritize the inspection over the cleaning. A roof that looks mossy but structurally sound is a weekend project. A roof with lifted shingles hiding under that moss is a very different conversation, and only a proper inspection tells you which one you're actually dealing with.
— Gabbi
Jhroof: A Safer Path When the Job Is Bigger Than a Weekend
If your roof falls into any of the "call a professional" categories covered above, steep pitch, multiple stories, or moss that's already caused visible damage, Jhroof handles the job with the same soft-wash, low-pressure approach recommended throughout this guide, backed by over 10 years of hands-on experience across Kent.
What makes this worth a call rather than another weekend on a ladder is the inspection that comes bundled with the treatment. Jhroof's team checks flashing, underlayment, and gutter condition while they're up there, so you find out about hidden problems before they become leaks instead of after. The company is fully insured, holds a 4.7 star Google rating, and offers 24 hour emergency response if storm damage turns up alongside the moss.
Every quote is free and comes with no obligation. If you want a real number for your roof rather than a rough estimate, request a quote through Jhroof's roof quote calculator and get a straightforward estimate before you decide how to move forward.
Sources
- Maintaining a moss-free roof takes some effort | Newsroom | Oregon State University
- Catalog
- ROOF MOSS CONTROL | Clean Water Services (PDF)