
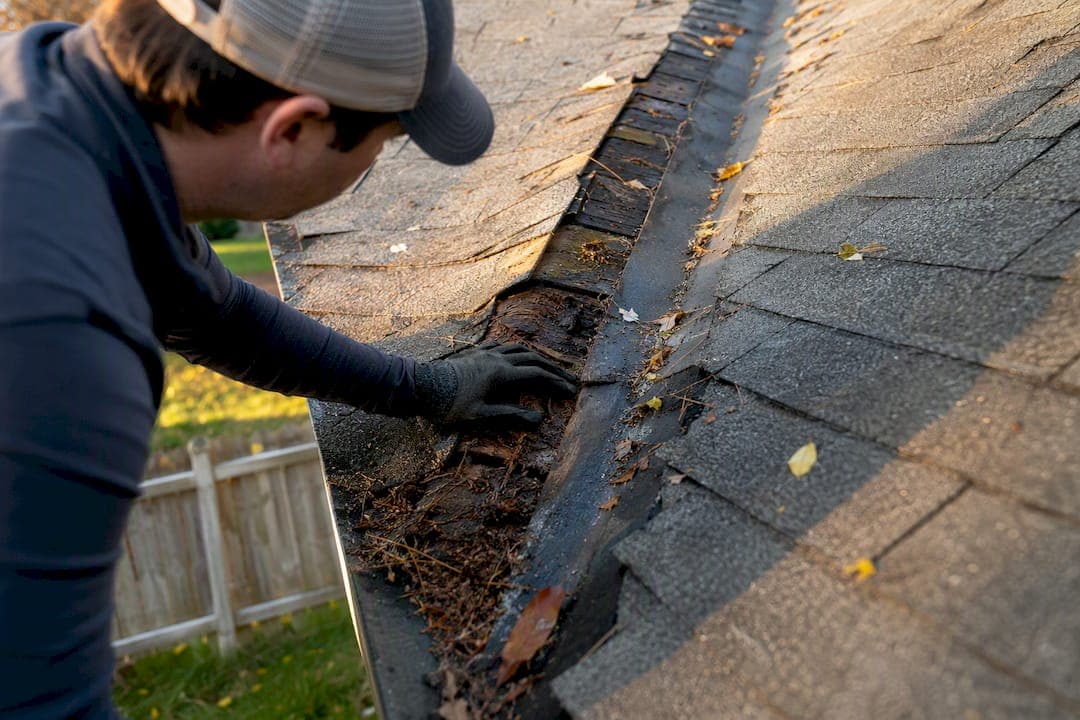
Most roof valley leaks trace back to failed flashing or missing underlayment, not a random shingle problem elsewhere on the roof. Valleys funnel more rainwater than any other part of your roof, so when the flashing corrodes, the shingles lose their factory clips, or debris dams the channel, water finds its way into your attic fast.
If you're standing under a wet ceiling right now, do three things before anything else:
- Protect the interior. Move furniture, set out buckets, and puncture a sagging ceiling bulge carefully to release trapped water before it drops on its own.
- Clear visible debris from the valley if you can safely see it from a ladder, without walking on a wet or icy roof.
- Document everything. Photograph the stain, the date, and any visible roof damage for your insurance file before you touch a single shingle.
Jhroof has spent over a decade tracing valley leaks across Kent roofs, and the pattern rarely changes: the fix is either a quick, safe DIY stopgap or a job for a licensed roofer. This guide tells you which is which.
Key Takeaways
Most roof valley leaks come from failed flashing, missing underlayment, or unclipped shingle corners, and fixing the cause requires precise material specs, not just sealant.
| Point | Details |
|---|---|
| Diagnose before repairing | Use attic stains, rafter tracing, and a garden-hose test to find the true entry point, not the drip location. |
| Temporary fixes buy months, not years | Sealant and tarps typically last 6 to 18 months before UV and weather break them down. |
| Follow the exact spec | Membrane should extend 24 to 36 inches up each side, with flashing overlapped 6 inches and nails kept 6 to 10 inches from centerline. |
| Know the cost stakes | Professional re-flash runs $600 to $2,400 in 2026, while delayed repairs can push costs toward deck replacement at $1,500 and up. |
| Call Jhroof for structural or repeat leaks | Jhroof's 24-hour emergency response and free quotes cover everything from a quick re-flash to full deck and valley replacement. |
Table of Contents
- Understanding Roof Valley Types and Why They Leak
- How to Find Where a Roof Valley Is Actually Leaking
- Temporary Fixes to Stop a Leaking Roof Valley Right Now
- Permanent Valley Repair: The Right Way to Re-Flash
- When to Call a Roofer and What It Costs in 2026
- Preventive Maintenance That Keeps Valleys Dry
- The Real Lesson Buried in Most Valley Leak Advice
- Sources
Understanding Roof Valley Types and Why They Leak
A roof valley is the internal angle where two roof slopes meet and funnel rainwater down toward a gutter. Because two planes drain into one channel, a valley can carry several times the water volume of an open slope during a heavy storm, which is exactly why manufacturers treat this area differently from the rest of the roof.
There are three main valley constructions, and each fails in its own way.
- Open valleys expose a metal channel running down the center, with shingles cut back on both sides. They're the easiest to inspect and repair because you can see the flashing directly.
- Closed-cut valleys have shingles from one slope running across the valley while the other side is trimmed and layered underneath, hiding the flashing from view.
- Woven valleys interlace shingles from both slopes over the centerline with no exposed metal at all. This design tends to fail most often because there's nowhere for water to escape once a shingle cracks or curls.
A related and often-missed cause is unclipped shingle corners. Manufacturers cut valley shingles at an angle and seal the corner down; when that seal fails or was never applied correctly, wind lifts the corner and water wicks sideways under the shingle above it. Fasteners driven too close to the valley centerline cause a similar problem, since each nail hole becomes a potential entry point sitting directly in the water's path.
How to Find Where a Roof Valley Is Actually Leaking
Water rarely drips straight down from where it enters. It can travel 6 to 20 feet along a rafter before showing up as a stain on your ceiling, which is why chasing the visible drip almost always leads you to the wrong spot on the roof.
Work through the diagnosis in this order:
- Check the attic first. Grab a flashlight and look for water stains, dark streaking, or mold along the rafters and sheathing near the valley. The highest stain mark usually sits closest to the actual entry point, since water travels downhill along the wood grain.
- Trace the rafters back toward the valley centerline to narrow down which section of flashing or underlayment is compromised.
- Run a garden-hose test. Have someone climb into the attic with a flashlight while you spray water on the roof from the bottom of the valley upward, working one section for 10 to 15 minutes before moving up. Stop as soon as your helper spots a drip and you've found your zone.
- Check the topside. If it's safe to do so, lift a few shingle edges near the suspected zone to check whether the underlayment is cracked, missing, or if fasteners are exposed and rusted.
Pro Tip: If the shingles are older and the sealant strips have gone brittle, don't force the edges up with your fingers. A heat gun and a thin, warmed knife blade will separate the adhesive cleanly without tearing the shingle, which matters if you plan to reuse it.
Stop the DIY inspection and call a roofer if you find soft, spongy decking underfoot, more than one active leak location, a roof pitch steeper than 6:12, or no way to safely anchor a harness. OSHA's fall protection standard requires protective measures for any roofing work above 6 feet, and a steep, wet valley is exactly the kind of surface where a fall happens fast.
Temporary Fixes to Stop a Leaking Roof Valley Right Now
A temporary fix buys you time. It doesn't replace the permanent repair, and treating it as a permanent solution is how a small leak becomes a rotted deck.
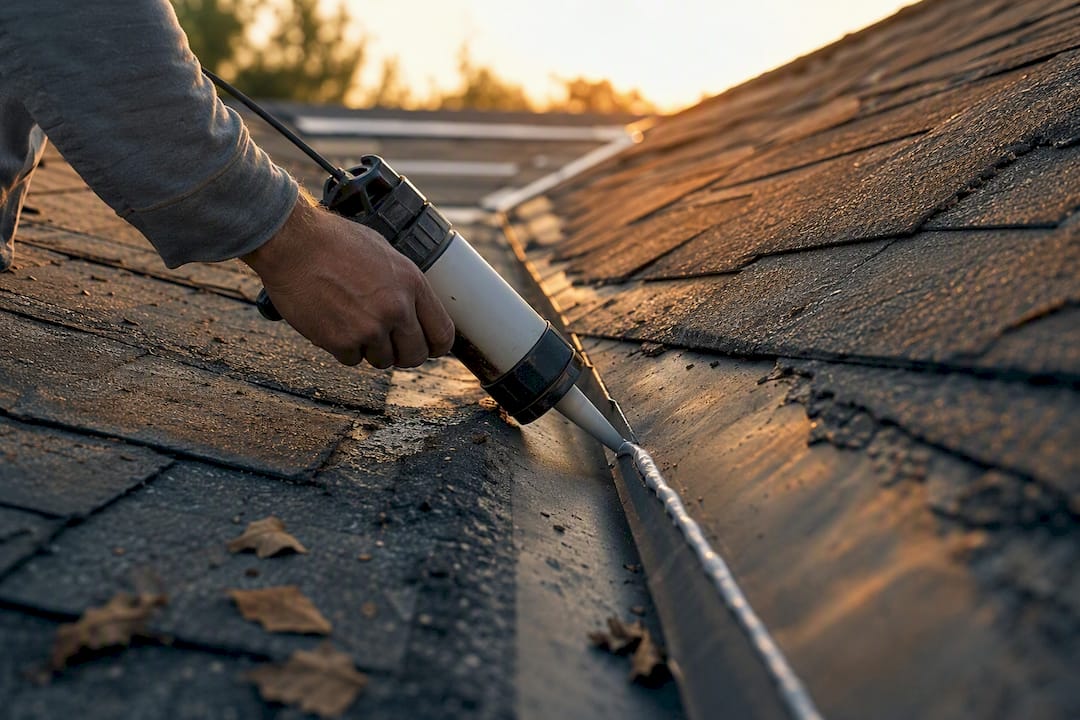
Inside the house, keep collecting water in a bucket, protect anything valuable nearby, and keep photographing the damage as it develops. Insurance adjusters respond better to a dated paper trail than a verbal description after the fact.
Outside, on a dry day only, you have a few realistic options:
- Clear leaves, branches, and granule buildup from the valley channel so water has a clear path to the gutter.
- Apply a compatible roofing sealant (not silicone, which doesn't bond properly to asphalt shingles or felt underlayment) directly over the cracked or lifted area.
- Secure a tarp over the valley using wood battens screwed into the roof frame rather than the shingles themselves, so you can remove it without new damage.
- On low-slope valleys, a strip of rolled roofing can act as a stopgap membrane.
None of these last forever. Sealants and tarps typically hold for 6 to 18 months before UV exposure and temperature swings break the bond down. Never attempt any of this on a wet, frosted, or icy roof; the traction loss isn't worth the risk to your safety.
Permanent Valley Repair: The Right Way to Re-Flash
A spot patch covers a symptom. A full re-flash fixes the cause, and it's the only repair that reliably lasts through multiple seasons rather than one. If your valley has already failed once, patching the same spot again usually just delays the next leak by a matter of months.
The standard professional workflow looks like this:
- Remove shingles roughly 3 feet back from the valley centerline on both slopes to expose the full deck underneath.
- Inspect the sheathing. Press on the exposed deck; any soft or spongy spot needs to be cut out and replaced with new plywood before you go any further, since flashing over rotted wood only delays a bigger repair later.
- Install self-adhering ice-and-water shield, centered on the valley and extending 24 to 36 inches up each slope. This membrane, not the shingles, is your actual waterproof barrier.
- Lay metal valley flashing starting at the eave and working up, overlapping each piece by 6 inches to keep water moving downhill rather than pooling under a seam.
- Nail only at the outer edges of the flashing, keeping fasteners 6 to 10 inches back from the centerline. A nail placed any closer sits directly in the highest-volume water path and becomes its own future leak point.
- Re-shingle, cutting valley-side shingles at a clean 45-degree angle and sealing the cut edge with a compatible roofing cement.
If your existing valley is woven or closed-cut, this is also the moment to consider converting to an open, exposed-metal design. Open valleys are the easiest to inspect and repair over time, which matters more than most homeowners realize when the next leak eventually shows up years down the line.
How much of this can you do yourself? Clearing debris, applying a temporary sealant, and running the diagnostic hose test are reasonable DIY tasks for a comfortable homeowner with basic ladder safety. Removing shingles, replacing deck sheathing, and installing new flashing is a different category of work. It requires cutting shingles at precise angles, handling metal flashing on a sloped surface, and getting the membrane overlap exactly right, and a mistake here doesn't just fail to fix the leak. It often creates a new one somewhere else in the valley.
Flashing failures account for roughly 40 to 50 percent of residential roof leaks, which tells you where to focus your attention if you're inspecting a roof you've never had assessed by a professional before.

When to Call a Roofer and What It Costs in 2026
Call a licensed roofer once you're dealing with rotted decking, more than one active leak, a roof older than 18 years, or any slope steeper than 6:12. Beyond the safety concerns, a roof at that age often has other valleys and flashing points nearing the same failure window, and a professional inspection catches those before they turn into a second emergency call.
Cost ranges for 2026 break down roughly like this:
- Temporary DIY patch: $75 to $200 in materials for sealant, a tarp, and battens.
- Professional valley re-flash: $600 to $2,400 depending on valley length, shingle type, and access difficulty.
- Deck replacement: $1,500 and up once rotted sheathing needs to come out, on top of the flashing work itself.
Waiting rarely saves money. Valley leaks spread laterally into the sheathing on both adjoining roof planes, and rot can extend 4 to 8 feet from the original entry point within a matter of months if left alone. What starts as a $600 re-flash can turn into a $3,000 deck repair by the time you get around to calling someone.
One more thing worth checking before you start any repair: most homeowner policies cover sudden, storm-related roof damage but exclude leaks caused by deferred maintenance. Photograph the damage and the date before repairs begin, since that record is often the difference between a covered claim and a denied one. If water has already reached your ceiling or walls, coordinating a ceiling repair specialist alongside your roof work can prevent a second contractor visit later.
Preventive Maintenance That Keeps Valleys Dry
A little seasonal attention keeps a healthy valley healthy for years, and it costs you almost nothing beyond a Saturday morning.
- Clear debris quarterly. Leaves and small branches collect fastest in valleys during fall, and a clogged channel is one of the most common triggers for a new leak.
- Check gutters and downspouts at the base of each valley to confirm water is actually draining away from the house rather than backing up.
- Inspect after major storms and again before winter, since ice buildup in a valley is one of the fastest ways to force water under otherwise sound shingles.
- Schedule a professional inspection every 3 to 5 years, even if nothing looks obviously wrong from the ground.
- Know your limits. Ground-level binoculars and a walk around the yard after a storm are fine for spotting obvious problems, but a full valley assessment on a steep or multi-plane roof calls for a drone survey or a roofer with proper access equipment.
Gutter cleaning and trimming overhanging branches are both safe, low-effort tasks most homeowners can handle themselves and should do at least twice a year.
Who's Behind This Guide
This guide was written by Gabbi, drawing on established roofing repair standards and field guidance used across the industry.
- Jhroof is a family-owned roofing company with over 10 years of experience serving residential and commercial clients across Kent.
- The company offers 24-hour emergency response for active leaks, backed by a 4.7-star Google rating.
- Its Flat Roof Replacement case study in Kent shows the kind of complex roofing work the team handles start to finish.
- Always confirm a contractor's insurance and any workmanship warranty in writing before repair work begins.
The Real Lesson Buried in Most Valley Leak Advice
Most articles on this topic treat every valley leak the same way, walking you through one generic repair regardless of what's actually failing. That's backward. The material specs matter more than the general advice: a nail driven 4 inches from centerline instead of 8 is the difference between a repair that lasts a decade and one that fails by next spring.
The conventional wisdom oversells sealant as a fix rather than what it actually is, a stopgap with a shelf life measured in months, not years. Homeowners who treat a tube of roofing cement as a permanent solution usually end up paying for the deck replacement they were trying to avoid.
If there's one priority worth taking from this guide, it's this: spend your effort on accurate diagnosis before you spend a dollar on materials. A correctly identified leak point turns into a straightforward repair. A guessed one turns into a pattern of patches that never quite holds, on a roof that keeps getting worse underneath the fixes you can see.
— Gabbi
Getting Your Valley Leak Fixed Right the First Time
A tarp and a tube of sealant will buy you time, but they won't stop a valley leak from coming back. Jhroof handles the part that actually matters: tracing the real entry point, replacing any rotted decking underneath, and installing new flashing and membrane to the correct overlap specs so the repair holds through multiple storm seasons, not just one.

If water is actively coming through your ceiling, Jhroof's 24-hour emergency repair service can get someone out to stop the damage before it spreads into your rafters and sheathing. For anything less urgent, a free, no-obligation quote gives you a clear cost estimate before any work starts, whether that turns out to be a simple re-flash or a full valley rebuild. Reach out today and get your roof properly assessed instead of guessing at another patch.