
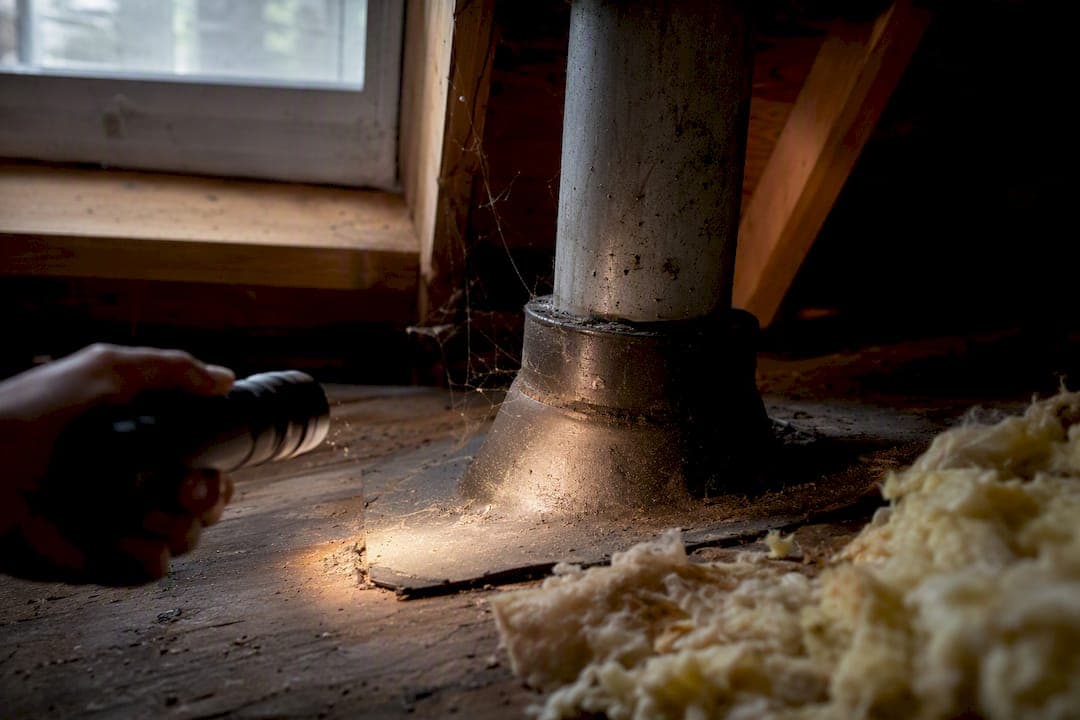
A failed rubber boot around your roof vent pipe is the most likely reason you're seeing water stains near a bathroom or kitchen ceiling. It's the single most common leak point on a residential roof, and in most cases you can confirm it with a quick attic check today. If water is actively coming through, don't wait to diagnose the exact cause before protecting your home.
- Set a bucket under the drip and move anything valuable out of the water's path.
- If water is near outlets, light fixtures, or wiring, shut off power to that circuit.
- Once things are stable, head to the attic with a flashlight and look for the vent pipe.
- Plan a hose test for daylight hours, and only get on the roof if it's dry and you're comfortable with ladder work.
Pro Tip: Never test or inspect a wet or icy roof. A dry attic check tells you almost everything you need to know without any climbing at all.
Key Takeaways
A failed rubber boot causes most roof vent pipe leaks, and a controlled hose test combined with an attic check reliably confirms the source before you choose a repair.
| Point | Details |
|---|---|
| Boot failure is the top cause | Rubber collars typically crack from UV and weather exposure within 8 to 15 years of installation. |
| Confirm before repairing | Use a two-person hose test with attic observation to isolate the exact leak entry point. |
| Match the fix to the damage | Slip-on collars work when the base flange is sound; full replacement is needed for cracked flashing or lifted bases. |
| Know your cost range | DIY materials run under $100, while professional installs generally cost $150 to $450. |
| Call a pro for structural signs | Soft decking, corroded pipes, or multiple leaks require a licensed roofer or plumber. |
| Jhroof handles the full scope | Jhroof offers free quotes, 24-hour emergency response, and insured repairs for vent leaks across Kent. |
Table of Contents
- Confirming a Roof Vent Pipe Leak: Signs and Diagnosis
- Quick DIY Fixes for a Leaking Vent Pipe
- How to Replace a Roof Vent Boot and Flashing
- When Should You Call a Roofer Instead of DIY?
- Preventing Future Roof Vent Leaks
- What Roofing Pros See With Persistent Vent Leaks
- Why the Simple Advice on Vent Leaks Misses the Point
- Get a Professional Fix From Jhroof
- Sources
Confirming a Roof Vent Pipe Leak: Signs and Diagnosis
Interior clues usually show up before you ever get on the roof. Look for ceiling stains that appear downhill from where the pipe passes through the roof deck, since water tends to travel along rafters before it drips. Damp or matted insulation directly under the vent pipe, along with rust streaks running down the pipe itself, both point to a boot or flashing failure rather than a random shingle problem.
Exterior confirmation takes a closer look at the penetration itself. Walk the roofline (or use binoculars from the ground) and check for:
- Radial cracks often develop in the rubber collar where it wraps the pipe.
- Flashing may become lifted, curled, or gapped away from the shingles.
- The storm collar may be missing, loose, or not installed.
- Shingles on the uphill side of the pipe may be cracked or displaced.
Rubber collars degrade from sun exposure and temperature swings, and failure commonly shows up 8 to 15 years after installation. If your roof is in that age range, the boot is a prime suspect.
To confirm the exact entry point, run a controlled hose test: one person stays in the attic with a flashlight while another sprays water on the roof in isolated zones, starting low and working uphill. This method isolates a penetration leak more reliably than guesswork. Watch for two false positives: shingle damage well uphill of the vent (a separate problem) and simple condensation dripping off a cold pipe in winter, which needs better attic ventilation, not a new boot.
Quick DIY Fixes for a Leaking Vent Pipe
If the base flange is still solid and only the rubber collar has failed, you have a few solid options before committing to a full tear-out.
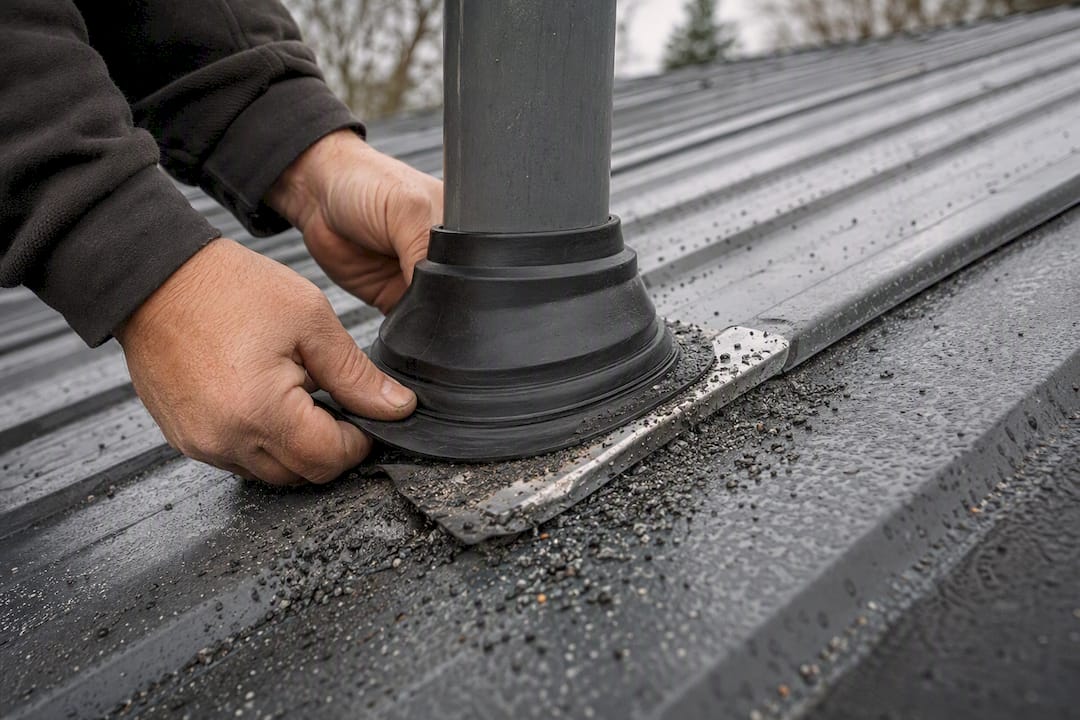
Slip-on collars and Perma-Boot retrofits slide down over the existing pipe and seal against the old flashing, and they're a legitimate fix when the base flange isn't lifted or corroded. They avoid disturbing the surrounding shingles, which means less risk of tearing shingle tabs that have gotten brittle with age. Expect a well-fitted retrofit to last several years, though it's still a secondary repair rather than a full reset of the flashing system.
Resealing the storm collar with a quality lap-seal caulk can stop a minor leak where the collar has separated from the pipe. Clean the surface thoroughly and apply caulk in a continuous bead, but treat this as a stopgap. Caulk alone breaks down faster than a properly seated collar and rarely holds up as a standalone fix for more than a season or two.
Temporary measures like a weighted tarp or a dab of roofing cement have their place, mainly when a storm just hit and you need to buy a few days before a proper repair. Roofing cement smeared over a cracked collar can slow a leak temporarily, but it traps moisture and complicates the eventual real repair.
- Slip-on collars: good when the base flange is intact
- Lap-seal caulk: short-term reseal only, not a lasting fix
- Tarps and roofing cement: emergency buy-time measures, not repairs
Pro Tip: Never attempt any of this on a wet, frosted, or steeply pitched roof. If you're not confident on a ladder or the pitch feels aggressive, this is exactly the kind of job worth handing to a pro.
How to Replace a Roof Vent Boot and Flashing
When the collar, flashing, or base has failed beyond a patch, full vent boot replacement is the durable fix. You'll need a new boot (thermoplastic or silicone collars last longer than builder-grade EPDM), roofing sealant, matching nails, a flat pry bar, replacement shingles, and basic fall-protection gear.
The repair follows a standard sequence:
- Carefully lift the shingles surrounding the vent pipe using the pry bar, working from the top down.
- Remove the old flashing and collar, pulling nails as you go.
- Inspect the pipe and roof deck underneath for corrosion or soft, rotted sheathing.
- Add a strip of ice-and-water shield around the penetration if the deck looks exposed or worn.
- Smooth any burrs or rough edges on the vent pipe before sliding the new boot over it, since a sharp edge can slice the rubber collar during installation.
- Slide the new flashing into place, re-seat the surrounding shingles, and nail and seal the new flashing with roofing cement over each nail head.
- Install or reinstall the storm collar on top of the boot for extra water shedding.
Before you call it done, check from the attic for daylight around the pipe, confirm there's no lingering corrosion, and press on the surrounding sheathing to check for soft spots.
- DIY materials typically run under $100
- Professional installation generally costs several hundred dollars., depending on pitch and access
- Ignoring the leak and letting it damage decking or ceilings can push total repair costs into the thousands
When Should You Call a Roofer Instead of DIY?
Some conditions mean it's time to stop and call a professional. Watch for:
- Soft or spongy roof decking when you press on it from the attic
- A corroded cast iron or galvanized vent pipe, which needs sleeving or replacement rather than a new boot
- Multiple leak points across the roof, not just one penetration
- Visible mold growth or any sagging in the roof structure
Pro costs climb when the scope grows beyond a simple boot swap. A corroded pipe often requires a plumber to sleeve or replace it, which can push costs into the hundreds or thousands depending on access and pipe material. A thorough professional visit typically includes an attic probe, a moisture meter reading, and sometimes infrared scanning for larger or commercial assemblies, a method outlined in ASTM's leak-detection standards. Ask for photos and a written scope before work begins.
Preventing Future Roof Vent Leaks
A twice-yearly check, in spring and after fall storms, catches most vent boot problems before they become ceiling stains. Add a quick look after any major windstorm or hail event too, since flying debris and wind uplift are common culprits behind sudden flashing damage.
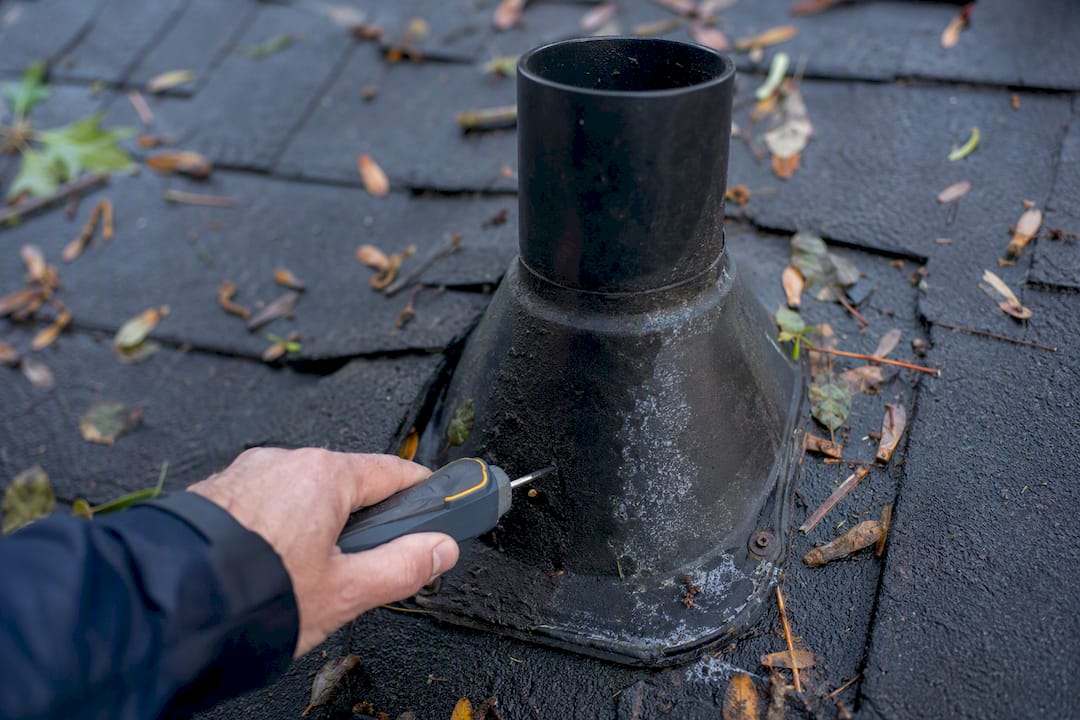
When you do replace a boot, consider upgrading to a thermoplastic or silicone collar instead of standard EPDM rubber. These hold up longer against UV exposure and temperature cycling, which means fewer repeat repairs over the life of your roof. If you're planning a reroof in the next year or two, professionals generally recommend swapping every vent boot at the same time, since boots wear out faster than shingles and reusing old ones risks an early repeat leak.
Inside the attic, check that ventilation and insulation are adequate. Poor airflow causes condensation on cold vent pipes that mimics a leak without any roof failure at all. For seasonal checklists and further guidance, Jhroof's roofing maintenance blog and end-of-summer roof tips cover timing in more detail, and winterizing guidance from One Day Doors & Closets offers useful seasonal context for the rest of the house.
Pro Tip: Mark your calendar for a spring and fall roof check. It takes ten minutes and it's the cheapest insurance you'll ever buy against a $150 boot turning into a $1,500 ceiling repair.
What Roofing Pros See With Persistent Vent Leaks
Jhroof has spent over 10 years handling roofing repairs across Kent, and vent pipe leaks are among the most frequent emergency calls the team gets. Persistent or recurring leaks usually mean more than a bad collar. A crew will often find soft decking that needs cutting out and replacing, a corroded pipe that needs a plumber brought in alongside the roofing work, or several failed penetrations on an aging roof that all need attention at once.
- 24-hour emergency response for active leaks
- Free, no-obligation quotes before any work starts
- A documented inspection covering deck condition, pipe material, and flashing scope
- A proven repair track record across residential and commercial roofs
Why the Simple Advice on Vent Leaks Misses the Point
Most guides treat vent boot leaks as a five-minute caulk job, and that's exactly where homeowners get burned. Caulk hides a symptom. It doesn't address why the collar cracked in the first place, and it definitely doesn't tell you whether the pipe underneath has started corroding.
The advice that actually holds up is less flashy: check twice a year, know your roof's age, and treat any leak older than a season as a decking question, not just a boot question. Homeowners who skip the attic inspection and go straight to a tube of roofing cement usually end up paying for the same repair twice, once for the quick patch and once for the water damage that patch didn't stop.
What the reader should prioritize first isn't the fix. It's the diagnosis. A five-minute attic check with a flashlight tells you more than any product review ever will, and it's the difference between a $40 slip-on collar and a conversation about replacing part of your roof deck.
— Gabbi
Get a Professional Fix From Jhroof
If your hose test confirms the leak, the collar is badly cracked, or you've found soft decking under the vent pipe, that's your signal to bring in a professional rather than keep patching. Jhroof handles vent pipe leaks across Kent with the same crew that installs full roofs, which means a repair gets tied into your roof's overall condition instead of treated as an isolated patch job.

Every visit starts with a free, no-obligation quote and a clear look at what's driving the leak, whether that's a failed boot, damaged flashing, or a deeper decking issue. Jhroof's 24-hour emergency response means you're not waiting days while water keeps finding its way into your ceiling, and every repair is backed by insured workmanship and a 4.7-star Google rating built over a decade of jobs across the region. If you're seeing signs of a vent pipe leak right now, request a free quote through Jhroof's roofing services page and get a firm answer on scope and cost before anyone sets foot on your roof.
Sources
- Family Handyman — Roof flashing: replace plumbing vent flashing
- The Roofing Brief — Vent pipe flashing replacement 2026: cost & DIY
- GAF — How to spot and prevent roof vent pipe leaks
- This Old House — How to fix a leaking rooftop vent pipe