
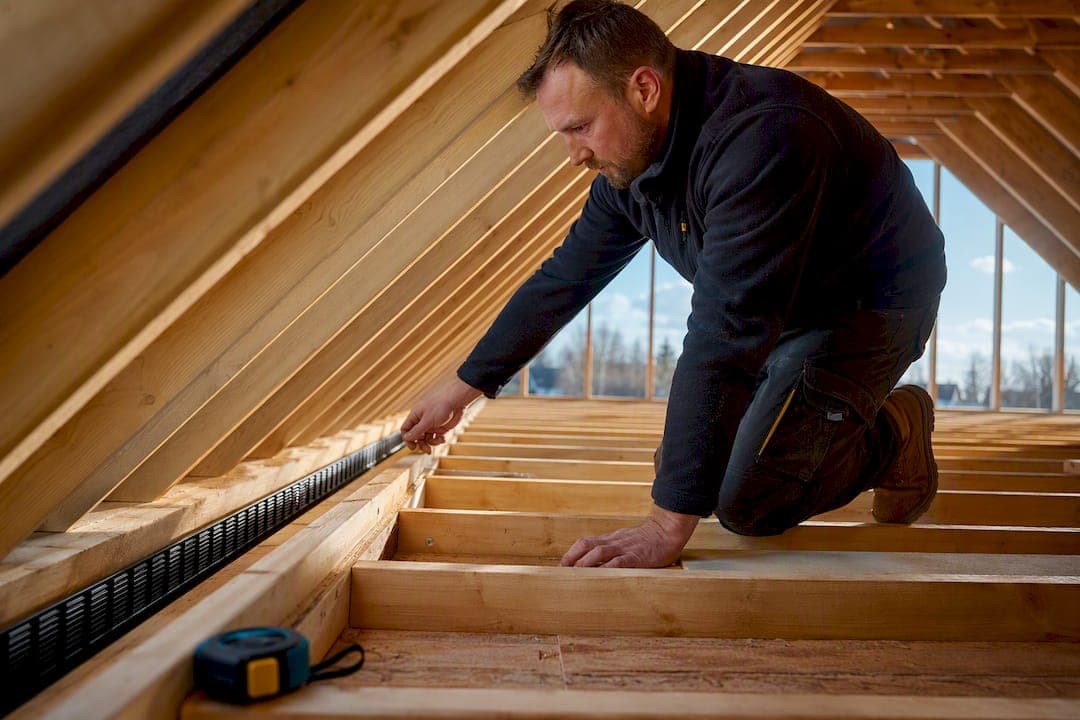
Most UK pitched roofs need continuous low-level ventilation at the eaves, equivalent to a 10mm or 25mm gap, plus a 5mm ridge gap where the pitch or span requires it, under BS 5250 and Approved Document C. Walk your loft now and check for blocked soffits, missing ridge ventilation, the wrong underlay, or condensation on timbers. If you spot any of these, call a professional roofer. A professional roofer can inspect and fix ventilation problems.
TL;DR:
- Most UK pitched roofs require at least a 10mm continuous eaves gap and a 5mm ridge gap, with larger gaps needed for shallower pitches or wider spans.
- Ventilation products like soffit vents, ridge vents, and tile vents must form a continuous system to be effective, with certified free area figures crucial for proper airflow.
- Properly sealed AVCL and unobstructed eaves and ridge vents are essential, especially for warm and hybrid roof types, to prevent condensation and timber decay.
- Conducting a detailed visual inspection or using a ventilation calculator helps determine whether your roof meets the specific BS 5250 standards.
- A professional roof inspection is recommended if blocked vents, damp timber, or missing components are identified, ensuring correct installation and ongoing maintenance.
Table of Contents
- What Is Roof Ventilation and Which Vents Do You Have?
- How Much Roof Ventilation Do You Actually Need?
- Cold, Warm, and Hybrid Roofs: Why Your Roof Type Changes Everything
- Choosing the Right Vents and Underlay: A 10-Point Checklist
- Getting Installation and Maintenance Right
- A Kent Case Study: Fixing Ventilation on a Flat Roof
- Why the Rulebook Is Worth Following
- Get a Professional Ventilation Check From Jhroof
- Where to Check the Rules Yourself
- Sources
- FAQ
What Is Roof Ventilation and Which Vents Do You Have?
Roof ventilation works on a simple principle: cooler, drier air enters at the eaves and rises out through the ridge, carrying moisture with it before it condenses on cold timber or the underside of your roof covering. That movement of air is what stands between a healthy loft and one with black mould creeping across the rafters. Get the airflow wrong, and you're not just risking a musty smell. You're risking timber decay that can cost thousands to put right.
UK roofs use two broad categories of ventilation, and knowing which one your house has is the first step to spotting a problem.
Low-level ventilation sits at the eaves, where the roof meets the walls. This is where fresh air enters the roof void. High-level ventilation sits near or at the ridge, where warm, moisture-laden air escapes. Between the two, batten-space ventilation creates a continuous air gap under the tiles or slates, usually around 25mm deep, running from eaves to ridge without interruption.
Here's how the common product types break down:
- Eaves and soffit vents — continuous strips or circular vents fitted into the soffit board or fascia, providing the low-level air intake.
- Over-fascia vents — fitted above the fascia board rather than through the soffit, popular where a soffit isn't deep enough to house a standard vent, or where roofline replacement work is already underway.
- Vent tiles (tile vents) — individual tiles or slates replaced with a ventilated equivalent, useful for spreading ventilation across a roof slope without altering the roofline.
- Dry ridge systems — mechanical ridge fixings that replace traditional mortar bedding, often incorporating a continuous ridge vent as part of the same installation.
- Ridge vents — a continuous or segmented vent running along the ridge line, providing the high-level outlet that pairs with eaves ventilation.
Klober's technical guidance on roofing ventilation stresses that every one of these products needs to work as part of a continuous system, not in isolation. A ridge vent fitted without adequate eaves intake achieves very little, because there's no fresh air being pulled through to replace the moist air leaving at the top.
Most manufactured vents also include integrated bird and insect meshes. These matter more than they sound. An unprotected vent gap is an open invitation to nesting birds, wasps, and insects, all of which can block the airway within a season or two. When you're checking product specifications, look for the certified free area figure, usually expressed in mm² per meter or mm² per vent. This is the number that determines whether a vent actually meets the ventilation requirement, not its physical size.
Pro Tip: A vent that looks generous from the ground can have a surprisingly small certified free area once the mesh and internal baffles are accounted for. Always check the manufacturer's stated free area figure rather than judging by eye.
How Much Roof Ventilation Do You Actually Need?
UK building guidance sets specific, numeric ventilation targets, and the figures are non-negotiable if you want a compliant, condensation-free roof. BS 5250:2021 is the code of practice for managing moisture in buildings, and NHBC Standards Section 7.2.15 translates it into practical tables that builders and roofers use every day. Approved Document C, which covers resistance to contamination and moisture in England, accepts compliance through BS 5250 as its recognized route.
The continuous-gap equivalents break down like this:
| Roof condition | Required continuous gap | Free area equivalent |
|---|---|---|
| Cold pitched roof, pitch above 15° | 10mm at eaves | a continuous ventilation gap providing the equivalent free area recommended by BS 5250 per meter |
| Cold pitched roof, pitch 15° or below | 25mm at eaves | 25,000 mm² per meter |
| Pitch above 30°, or span over 10m | Add 5mm at ridge | a continuous ventilation gap providing the equivalent free area recommended by BS 5250 per meter |
| Warm roof (insulation above rafters) | 25mm eaves and 5mm ridge | 25,000 and 5,000 mm² per meter |
These figures come directly from the BS 5250 and Approved Document C guidance summarized by TradeCalculator, and they're worth writing down before you climb into your loft with a tape measure.
The conversion method is simpler than it looks: multiply the required gap in millimeters by 1,000 to get the free area in mm² per meter. A 10mm continuous gap becomes 10,000 mm²/m. A 25mm gap becomes 25,000 mm²/m. This continuous-gap method has largely replaced older area-ratio calculations because it's far easier for a homeowner or installer to apply without a calculator app open on their phone.
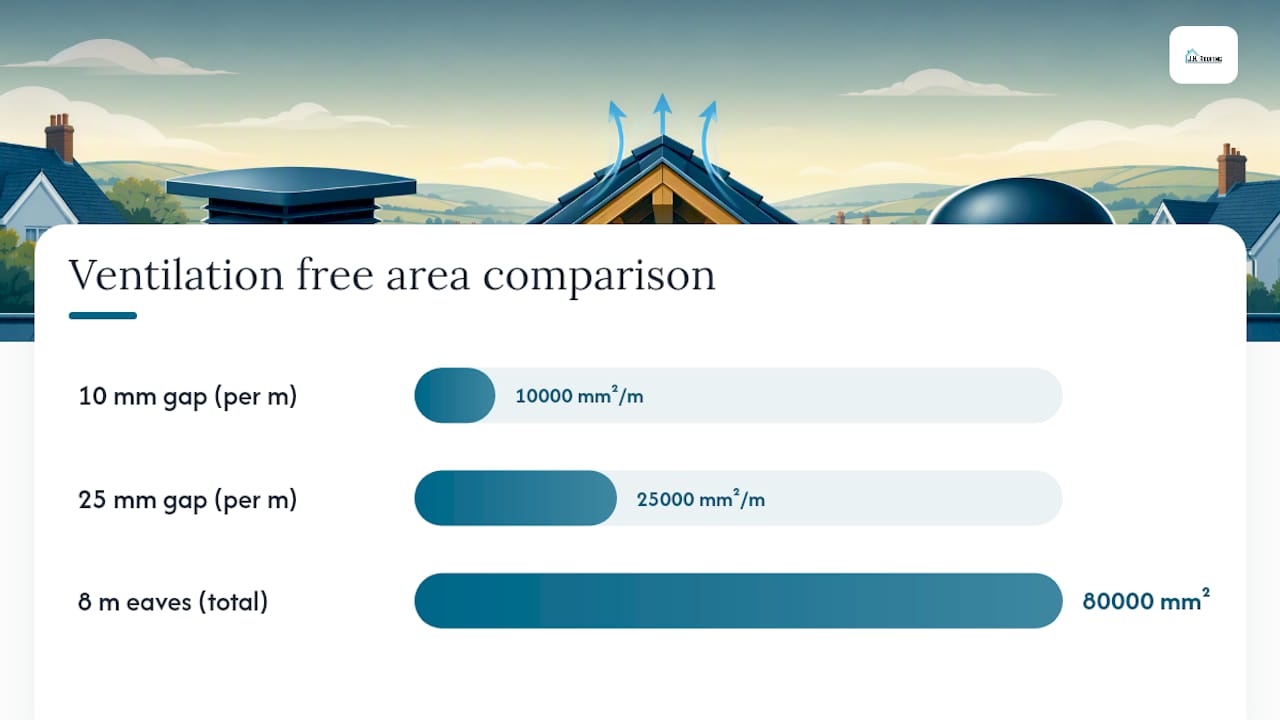
Here's a worked example. Say you have a semi-detached house with a pitched roof at 30°, and 8 meters of eaves length on the front elevation. At a 10mm gap requirement, you need 10,000 mm²/m of continuous free area, which means 80,000 mm² total across that eaves run. If your chosen eaves vents each carry a certified free area of 8,000 mm², you'd need ten of them spaced evenly along those 8 meters.
The 10mm/25mm split hinges on pitch, and pitch is the detail most homeowners overlook. A shallow-pitched roof holds warm, moist air closer to the roof covering for longer, which is why regulations demand more than double the ventilation of a steeper roof.
If your roof is a lean-to or mono-pitch design, or if it butts against another roof plane, additional local ventilation is usually needed around the junction, since airflow can't travel in a single continuous path the way it does across a simple gable roof. This is exactly the kind of detail a TradeCalculator-style roof ventilation calculator is built to handle. Plug in your roof's pitch, span, and eaves length, and it returns the free area you need and how many standard vents that translates to.
Cold, Warm, and Hybrid Roofs: Why Your Roof Type Changes Everything
Ask most homeowners what kind of roof they have and you'll get a blank look. Yet this single classification determines almost everything about your ventilation strategy.
A cold roof has insulation laid at ceiling level, between and over the joists, leaving the roof void above cold and unheated. This is by far the most common setup in older UK housing stock. Because the roof void stays cold, moisture that rises from the living space below (through gaps, hatches, and poorly sealed light fittings) will condense the moment it hits cold timber or the underside of the roof covering. That's why cold roofs depend so heavily on eaves and ridge ventilation to flush that moisture out before it settles.
A warm roof has insulation fitted above or between the rafters, right up against the roof covering, so the roof void itself stays close to room temperature. Warm roofs are common in loft conversions and newer builds. Because there's less temperature differential to drive condensation inside the structure, warm roofs rely more heavily on a correctly installed AVCL (air and vapor control layer) than on ventilation alone, though eaves and ridge ventilation above the insulation layer is still typically required.
A hybrid roof mixes the two, often where a loft has been partially converted, leaving some cold roof areas alongside a warm, insulated section. These are the trickiest to get right, because the transition points between cold and warm zones are exactly where condensation risk concentrates.
How to identify which one you have:
- Climb into the loft and check where the insulation sits. Insulation only at ceiling/joist level means a cold roof.
- Insulation between or above the rafters, hugging the roof slope, signals a warm roof.
- A mix of both, especially near a loft conversion, means you're dealing with a hybrid setup.
- Check for a plastic or foil membrane fitted on the warm side of the insulation. That's your AVCL, and its absence in a warm roof is a red flag.
Underlay choice interacts directly with all of this. HR (high resistance) underlays are vapor impermeable and require full ventilation as if the underlay wasn't there. LR (low resistance) underlays, sometimes called breathable membranes, can reduce the ventilation quantity required, but only when they carry genuine third-party assessment confirming vapor and air permeability. Don't take a manufacturer's marketing claim at face value here. Ask for the accreditation certificate.
Flat roofs, and pitched roofs that meet a flat roof section, need their own ventilation consideration at the junction, since airflow across the pitched section can't simply continue into the flat structure without a deliberate detail built in.
Choosing the Right Vents and Underlay: A 10-Point Checklist
Getting the ventilation numbers right on paper means nothing if the wrong product ends up on your roof. Selection comes down to a handful of practical criteria: the vent's certified free area, whether it physically fits your tile or slate profile, and whether the fixing method matches the manufacturer's installation instructions. A vent that isn't compatible with your roof covering profile will never seal properly, and a gap in the seal defeats the entire purpose of controlled ventilation.
Verifying your underlay type takes a bit of detective work if you weren't there when the roof was installed. Check any leftover packaging in the loft or garage, or ask the original installer for the product name, then look up whether it's classified HR or LR and whether it carries third-party certification. If you genuinely can't determine the type, treat the roof as though it has an HR underlay and ventilate to the full BS 5250 requirement. It's the safer assumption.
For an AVCL check in a warm roof, look for the vapor barrier positioned on the warm (room) side of the insulation, sealed at joints and around penetrations like light fittings or loft hatches. A poorly sealed or missing AVCL is one of the most common causes of warm roof condensation, and it's often invisible until damage has already started.
Here's a ten-point checklist to run through before deciding whether you need a professional:
- Check for daylight or airflow at every eaves point, not just one corner.
- Confirm ridge ventilation exists and isn't painted over or blocked with debris.
- Look for insulation stuffed into or over the eaves gap, blocking the intake.
- Check for bird nests, wasp nests, or leaf litter inside vent openings.
- Inspect underlay for sagging, tears, or missing drape at the eaves.
- Look for black mould spots or dark staining on rafters and the underside of the roof covering.
- Feel for damp or soft timber, particularly near the eaves and ridge.
- Check loft hatches and light fittings for gaps that let warm, moist room air escape upward.
- Confirm the AVCL is present and intact if you have a warm roof or loft conversion.
- Note the roof's pitch and eaves length so a contractor can quickly calculate the required free area.
Pro Tip: Take a torch and a phone camera into the loft in winter, on a cold morning after the heating's been on overnight. Condensation and its telltale staining show up far more clearly then than on a mild summer afternoon.
Simple issues, like clearing debris from an existing vent or removing insulation that's crept over an eaves gap, are reasonable DIY fixes. Anything involving underlay replacement, AVCL installation, or ridge work needs a contractor, both for safety and because getting it wrong risks trapping moisture rather than releasing it.
Getting Installation and Maintenance Right
Installation quality determines whether all that careful calculation actually works once the roof is closed up. The single most common failure point is a continuous ventilation path that isn't actually continuous. Insulation pushed too far into the eaves, a fascia board fitted without an eaves spacer, or a batten-space vent interrupted by a valley or party wall wall can each choke off the airflow the calculations assumed would be there.
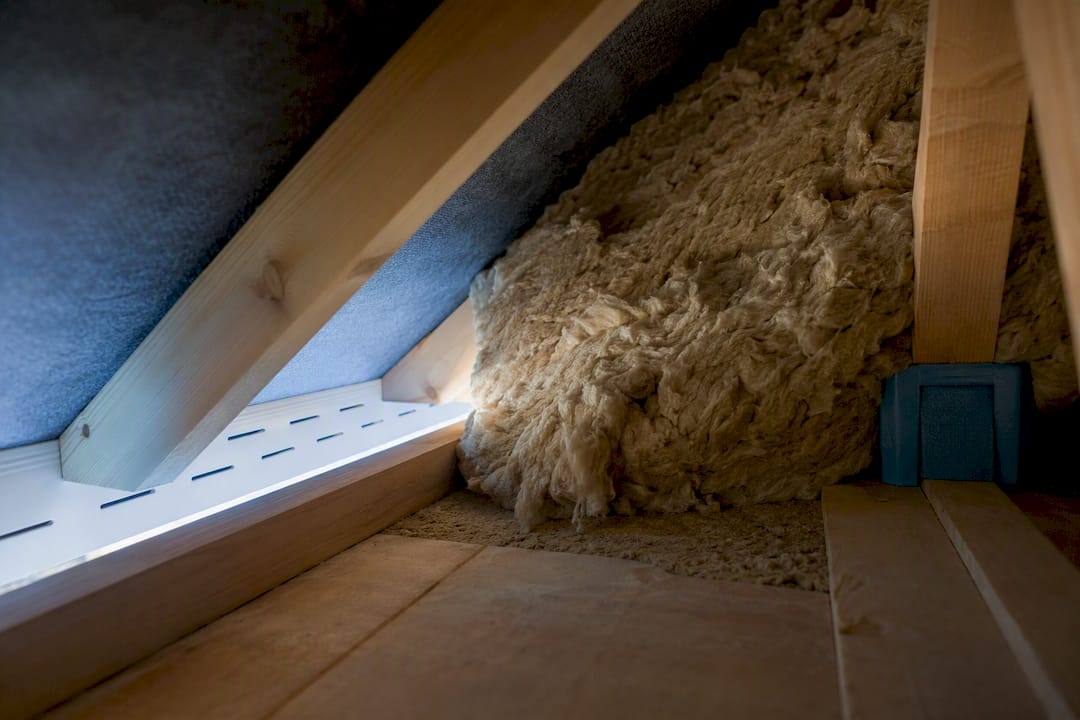
Where batten-space ventilation is used, technical guidance from Wienerberger is clear that the void must run continuously from eaves to ridge, and that any obstruction, such as a valley, hip, or party wall, needs additional local ventilation gaps fitted above and below the interruption to keep air moving on both sides.
Underlay fixing matters too. The membrane needs the correct drape between rafters, roughly a 10 to 15mm sag, so that any water reaching the underlay runs down to the eaves and out rather than pooling against the timber. Underlay pulled too tight, or fixed with the wrong overlap, defeats its own purpose.
Common mistakes worth watching for:
- AVCL fitted on the wrong side of the insulation, or left unsealed at joints and penetrations.
- Loft insulation pushed hard against the roof slope, blocking the eaves airflow entirely.
- Soffit vents painted over during a redecoration, sealing the intake shut.
- Ridge tiles bedded with mortar over what should be a ventilated dry ridge system.
On maintenance, an annual check is a reasonable baseline for most homes, ideally in autumn before the heating season starts pushing more moisture upward from living spaces. A post-storm inspection is worth adding to that routine too, since high winds can dislodge ridge tiles or push debris into eaves vents. Jhroof's end-of-summer roofing checklist covers many of these same seasonal points if you want a structured routine to follow.
New-build owners should know that NHBC guidance flags the first heating season as higher risk, since construction moisture is still drying out of timber and plaster. Builders sometimes fit temporary additional high-level ventilation during this period specifically to manage that extra load.
A Kent Case Study: Fixing Ventilation on a Flat Roof
A flat roof replacement carried out in Kent illustrates how ventilation problems often hide behind a symptom that looks like something else entirely. The homeowner had noticed a persistent damp patch on a bedroom ceiling below a flat-roofed extension and had assumed, reasonably enough, that it was a straightforward leak.
Inspection told a different story. The felt covering had failed in places, yes, but the deeper issue was inadequate ventilation within the roof structure itself, allowing condensation to build up under the deck and track along to the weakest point in the ceiling below. The fix combined a full flat roof replacement with correctly specified ventilation detailing, addressing both the visible leak and the underlying moisture buildup that had caused the damage in the first place.
Roofs rarely fail for one reason alone. A visible leak often points to a moisture problem that started somewhere else in the structure, and ventilation is usually part of that picture even when it isn't the first thing anyone suspects.
A local roofing company with more than ten years' experience, a high Google rating, and a 24 hour emergency response service provides these types of roofing services in Kent. Every inspection starts with a free, no-obligation quote, which matters most when a homeowner isn't yet sure whether they're looking at a quick vent fix or a larger structural issue.
Why the Rulebook Is Worth Following
Homeowners tend to treat ventilation rules as bureaucratic box-ticking, something a building inspector cares about more than they do. That's backwards. BS 5250 and the NHBC tables built on it exist because interstitial condensation is slow, cumulative, and expensive to reverse once it's taken hold in structural timber.
The gap between a compliant roof and a non-compliant one usually isn't dramatic to look at. It's a soffit vent painted shut, or insulation pushed a few inches too far toward the eaves. Small oversights, multiplied across years of trapped moisture, are what turn a 10mm gap problem into a rafter replacement problem.
Following the NHBC's ventilation and vapor control guidance as your baseline, rather than guessing at what "seems like enough airflow," is the cheapest insurance available against timber decay and energy loss alike. A checklist gets you most of the way there. Pairing it with a professional inspection catches the details a torch and a Saturday morning in the loft tend to miss.
— Gabbi
Get a Professional Ventilation Check From Jhroof
If your checklist turned up blocked vents, missing AVCL, or damp timber, the fix usually isn't a single replacement part. It's a coordinated look at eaves ventilation, ridge ventilation, underlay condition, and insulation placement together, which is exactly where a DIY approach tends to run out of depth. This local roofing service handles the full picture, from vent installation and AVCL correction to flat roof replacement and structural repairs where condensation has caused damage.

Many roofing services start with a free, no-obligation quote and can offer a 24 hour emergency response for leaks and storm damage. If your loft check raised concerns about blocked soffits, a missing ridge vent, or damp rafters, book an inspection through Jhroof's roofing services page and get a clear, itemized answer on what your roof actually needs.
Where to Check the Rules Yourself
For the regulatory detail behind everything above, go to the source documents directly: BS 5250:2021 and Approved Document C set the legal baseline, NHBC Standards Section 7.2.15 translates it into practical tables, and a TradeCalculator ventilation calculator handles the mm²/m math. For product-level detail, Klober's technical guides cover installation specifics manufacturer by manufacturer.
Sources
- NHBC Standards — 7.2.15 Ventilation, vapour control and insulation
- Roof Ventilation Requirements UK Calculator | BS 5250 | TradeCalculator
- Your guide to Roofing Ventilation — Klober (technical guide / product catalog)
- Roof space ventilation — Wienerberger technical note
FAQ
What are the roof ventilation requirements in the UK?
UK roofs must be ventilated per BS 5250 and Approved Document C, typically a 10mm continuous eaves gap for roofs above 15° pitch, 25mm for shallower pitches, and an added 5mm ridge gap for steeper or wider spans.
How much does it cost to have roof vents installed in the UK?
Costs vary by vent type, roof access, and how many vents your eaves length requires, so getting a property-specific quote from a roofer like Jhroof is more reliable than a generic estimate.
What is the British standard for ventilation in buildings?
BS 5250:2021 is the British Standard covering the management of moisture in buildings, including the ventilation requirements for pitched and flat roofs referenced by Approved Document C.
Do British houses have roof vents?
Most British houses have some form of roof ventilation, typically eaves or soffit vents paired with ridge ventilation, though older properties are frequently found with vents blocked by insulation, paint, or debris during inspection.
How do I know if my roof has enough ventilation?
Check for continuous, unblocked eaves vents, an open ridge vent, and no condensation or mould staining on loft timbers; if any of those checks fail, a professional inspection can confirm whether your free area meets the BS 5250 requirement.