
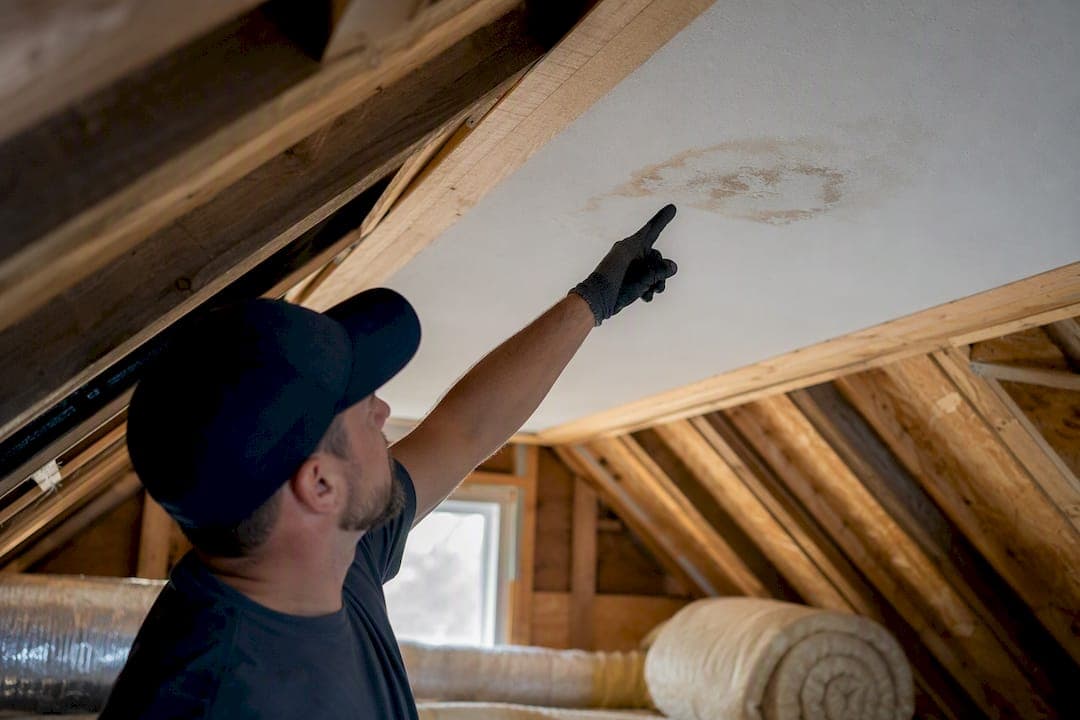
A water stain on your ceiling almost always means moisture has gotten past your roof or a pipe and into the drywall above your head. The single most important step is stopping the water source before you touch a paintbrush. Press the stain gently; if it feels soft or spongy, water may still be active. If the mark hasn't grown after a recent rain, you likely have time to plan the repair properly.
TL;DR:
- Water stains may indicate ongoing leaks from roof damage, plumbing, or HVAC, and active stains require immediate containment and shutoff procedures.
- Ceiling stains that worsen after storms likely stem from roof leaks, while those under bathrooms suggest plumbing issues, and attic tracking can confirm the source.
- Always dry out the affected area for at least 48 hours before cleaning or repairing, and avoid painting over active leaks to prevent trapping moisture.
- Use proper stain-blocking primers and inspect for structural drywall damage before repainting for long-lasting results.
- Large or recurring stains, sagging drywall, or stains near electrical fixtures signal the need for professional assessment rather than DIY repair.
Table of Contents
- Water Stain Ceiling Causes: Roof, Plumbing, HVAC, or Condensation?
- Immediate Steps to Take Before Any Repair
- How to Clean and Repair a Water Stain on Your Ceiling
- Preventing Water Stains Before They Start
- Red Flags That Mean It's Time to Call a Professional
- How Roofing Contractors Diagnose Stain Sources
- Balancing DIY Confidence With Knowing Your Limits
- Get a Roof-Sourced Stain Fixed Right the First Time
- Sources
Water Stain Ceiling Causes: Roof, Plumbing, HVAC, or Condensation?
The location and timing of the stain tell you almost everything about where the water came from. Before you grab a ladder, think back over the last week or two: was there a storm, a running shower, or a heat wave?
- Roof leaks: Stains that appear or spread right after heavy rain, especially near exterior walls, chimneys, or skylights, usually trace back to failed flashing, cracked shingles, or clogged gutters backing up under the roofline.
- Plumbing leaks: A stain below a bathroom, kitchen, or laundry area that grows steadily regardless of weather, or that darkens whenever a fixture runs, points to a pipe joint, supply line, or drain leak.
- HVAC condensation: If the mark shows up mainly in summer, sits near an attic air handler, and has no connection to rainfall, a clogged condensate line or overflowing drain pan is a common and often overlooked cause, according to The Spruce.
- General condensation: Poor attic ventilation or high indoor humidity can leave damp rings around vents and exterior corners without any active leak at all.
Location clues on rooms below the source also help narrow things down. Stains that worsen right after storms typically point to the roof, while ones unrelated to weather but positioned beneath a bathroom usually mean plumbing, and attic air handler stains tend to track with cooling season rather than rainfall, according to Coastline's diagnostic guidance. If you can safely access your attic, look for damp insulation, dark trails along rafters, or daylight coming through a gap. A moisture meter, available cheaply at most hardware stores, takes the guesswork out of confirming whether an area is still wet.
Pro Tip: Water rarely drips straight down from its entry point. It travels along rafters, wiring, or ductwork before showing up on your ceiling, sometimes several feet from where the actual leak started. Trace the stain uphill in the attic and match it against your weather history before assuming you know the source.
Immediate Steps to Take Before Any Repair
Once you spot an active stain, your first job is damage control, not cosmetics. Work through these in order:
- Contain the water. Place a bucket under any active drip and, if the ceiling is bulging, carefully puncture a small relief hole at the lowest point so water drains in a controlled way instead of collapsing the drywall.
- Cut power if needed. If the wet area is near a light fixture, ceiling fan, or outlet, shut off the circuit at your breaker panel before doing anything else. Water and electricity are a dangerous combination.
- Shut off the water supply to the affected fixture, or the main line if you can't isolate the source, especially if you suspect a burst or leaking pipe.
- Avoid standing directly under a sagging section. A ceiling that's visibly drooping can fail without warning.
- Start drying the area with fans and a dehumidifier, and open attic vents if it's safe to do so. Give the space at least 48 hours to dry before moving to cleaning or repair, since damp drywall can begin developing mold in as little as 24 to 48 hours, per SERVPRO.
- Photograph everything as it happens, including the stain's size, the date, and any visible dripping. Insurance adjusters rely heavily on timestamped documentation when evaluating water damage claims.
Never paint over an active leak. It hides the problem temporarily while moisture keeps working behind the new finish, according to The Spruce.
How to Clean and Repair a Water Stain on Your Ceiling
Once the leak is fixed and the ceiling has had at least 48 hours to dry, and ideally a moisture meter reads dry to the touch, you're ready for the actual repair. Here's the sequence that holds up over time:
- Clean the stain. For a fresh, light stain, a vinegar solution usually lifts it. For older or mildewed marks, mix one part bleach to three parts water, wear gloves and eye protection, and ventilate the room well, per Southern Living.
- Inspect for structural damage. If the drywall paper is peeling, the taped seams have broken, or the panel still sags after drying, cleaning alone won't fix it. That section needs patching or full panel replacement, according to BobVila.
- Patch as needed. Remove loose or damaged paper, apply new tape over seams, spread joint compound in thin layers, let it cure, then sand and feather the edges so the patch blends into the surrounding ceiling.
- Prime with a stain blocker. Regular latex primer often lets tannin and iron stains bleed right back through. A shellac-based or oil-based stain-blocking primer seals the discoloration properly, according to Popular Mechanics.
- Repaint the full ceiling, not just the patched spot, since spot-painting almost always leaves a visible sheen mismatch under overhead light.
Statistic Callout: Basic cleaning supplies for a small ceiling stain typically run under $25, according to BobVila. That's a genuinely small investment, but it only pays off if the leak itself is already fixed. Skip that step and the same stain will be back within a season.
Preventing Water Stains Before They Start
Most ceiling stains trace back to small maintenance gaps that build up over months or years. A short seasonal checklist catches the majority of them before they turn into repair jobs.
- Clear gutters and downspouts, then inspect roof flashing and shingles each spring and fall.
- Schedule annual HVAC service and check that the condensate drain line and drip pan aren't clogged or overflowing, particularly before summer.
- Inspect caulk and seals around bathroom fixtures, and insulate exposed pipes in unheated spaces like attics and crawlspaces.
- Run bathroom and kitchen exhaust fans during and after every shower or cooking session, and confirm they vent outside rather than into the attic.
- Keep indoor humidity between 30 and 50 percent; a cheap humidity meter makes this easy to track.
- Walk your attic after major storms and check roof penetrations, like vent pipes and chimneys, for animal damage or displaced flashing.
Pro Tip: A clogged AC condensate line is one of the most common causes people mistake for a roof leak, since both show up as ceiling stains near the attic. If the mark appears only in summer with no rain in sight, check the condensate line before you call a roofer.
Red Flags That Mean It's Time to Call a Professional
Some ceiling stains are a weekend project. Others are a sign of something bigger happening above your head, and pushing forward with DIY at that point can cost you more than it saves.
- Sagging or bulging drywall, which signals trapped water and a real risk of collapse.
- Active, heavy dripping that hasn't slowed after your initial containment steps.
- Any wet ceiling near electrical wiring, fixtures, or panels.
- Stains covering a large area or affecting multiple rooms.
- Visible mold growth, a musty smell, or discoloration that keeps spreading.
- A stain that returns after you've already cleaned and repainted it once.
Match the trade to the clue: a roofer for anything tied to rain or attic leaks, a plumber for fixture-related stains, an HVAC technician for condensate issues, and a restoration specialist like Pure Resto once mold or contamination is involved. A proper inspection should include attic tracing, moisture mapping, photos of the damage, and a written repair recommendation with clear warranty terms, not just a verbal guess.
How Roofing Contractors Diagnose Stain Sources
Jhroof has spent over 10 years tracking down exactly these kinds of leaks across Kent, and the diagnostic process rarely starts at the stain itself. Contractors photograph attic framing, follow damp trails uphill, and, when a roof leak is suspected, sometimes run a controlled hose test on discrete sections of roof while someone watches from inside to catch exactly where water enters.
- Family-owned and insured, with over 10 years of residential and commercial roofing experience across Kent.
- 24-hour emergency response for active leaks that can't wait until morning.
- Free, no-obligation quotes backed by a 4.7-star Google rating.
- A documented flat roof replacement case study showing the full repair workflow from inspection to finish.
Balancing DIY Confidence With Knowing Your Limits
Sequence is everything with a ceiling stain. Stop the water, confirm the area is genuinely dry, and only then start cleaning or patching. Skip a step and you're just painting over a problem that's still active underneath.
I'd tackle a small, dry, surface-level stain myself. But sagging drywall, exposed wiring, or a stain that keeps coming back tells me the cause is bigger than a weekend fix, and that's when I'd want a contractor's eyes on it, not just mine. Take photos, note when the stain first appeared, and check your attic before you call anyone. Showing up prepared gets you a faster, more accurate quote.
— Gabbi
Get a Roof-Sourced Stain Fixed Right the First Time
If your ceiling stain traces back to your roof, a caulk gun and a can of primer only buy you time. Jhroof brings 10 years of Kent-based leak tracking to the job, so instead of guessing at flashing or shingle damage, you get an attic inspection, photo documentation, and a written quote that spells out exactly what's wrong and what it takes to fix it.

Every visit includes a free, no-obligation quote, and if the leak is active right now, Jhroof's 24-hour emergency response means you're not left with a bucket under a dripping ceiling overnight. For a wider look at what's covered, the roofing services page breaks down repairs, re-roofs, and flat roofing work, while the emergency repair page is built specifically for leaks that can't wait. If you'd rather see the numbers before you call, the roof quote calculator gives you an instant estimate to start from.
Sources
The guidance in this article draws on established water damage and home repair authorities, including SERVPRO's water stain guidance, BobVila's ceiling stain repair guide, Popular Mechanics on stain-blocking primers, and Southern Living's cleaning methods. For plumbing-related leaks, Texas Comfort Crew's plumbing services are worth a look, and Kent homeowners can review seasonal maintenance tips from Jhroof to stay ahead of future stains.
- Water stains on ceiling/walls guidance | SERVPRO
- Water Stains on the Ceiling: Common Causes and Solutions | BobVila
- How to Remove Water Stains From Your Ceiling | Southern Living